Author: Modern Urban Prepper Editorial Team

  • Emergency Food Supply for Apartments: Complete Guide (2026)

    Emergency Food Supply for Apartments: Complete Guide (2026)

    Building an emergency food supply apartment dwellers can rely on is not about filling a basement with pallets of freeze-dried meals. It is about making smart choices that fit the space you actually have. Whether you live in a studio or a two-bedroom walkup, a well-planned food reserve can keep you fed and calm when grocery runs are not an option.

    Power outages, severe storms, supply-chain disruptions, and public-health emergencies can cut access to food for days or even weeks. The Federal Emergency Management Agency (FEMA) recommends every household maintain at least a three-day food supply—and ideally two weeks’ worth. This guide shows you exactly how to do that in a small urban apartment, step by step. If you are also working on water reserves, pair this with our urban water storage guide for a complete setup.

    How Much Food Should You Store?

    The math is straightforward. An average adult needs roughly 2,000 calories per day to maintain basic function during an emergency. Active adults or those in cold environments may need 2,400–2,800. Children ages 4–8 need about 1,200–1,400 calories.

    Use this simple formula to calculate your household target:

    (Number of people) × (2,000 cal/day) × (Number of days) = Total calories needed

    For a two-person household planning a 14-day supply, that equals 56,000 calories. Sounds like a lot, but calorie-dense foods compress that number into surprisingly little space. A single jar of peanut butter packs nearly 2,700 calories. A one-pound bag of rice holds about 1,600 calories.

    Recommended Minimums by Household Size

    • 1 adult, 14 days: 28,000 calories — fits in roughly 2 medium storage bins
    • 2 adults, 14 days: 56,000 calories — fits in 4 medium bins or one closet shelf
    • Family of 4, 14 days: 98,000–112,000 calories — requires dedicated closet or under-bed storage across rooms

    Start with a three-day supply, then build toward two weeks. This approach spreads out both cost and the effort of organizing your apartment food storage.

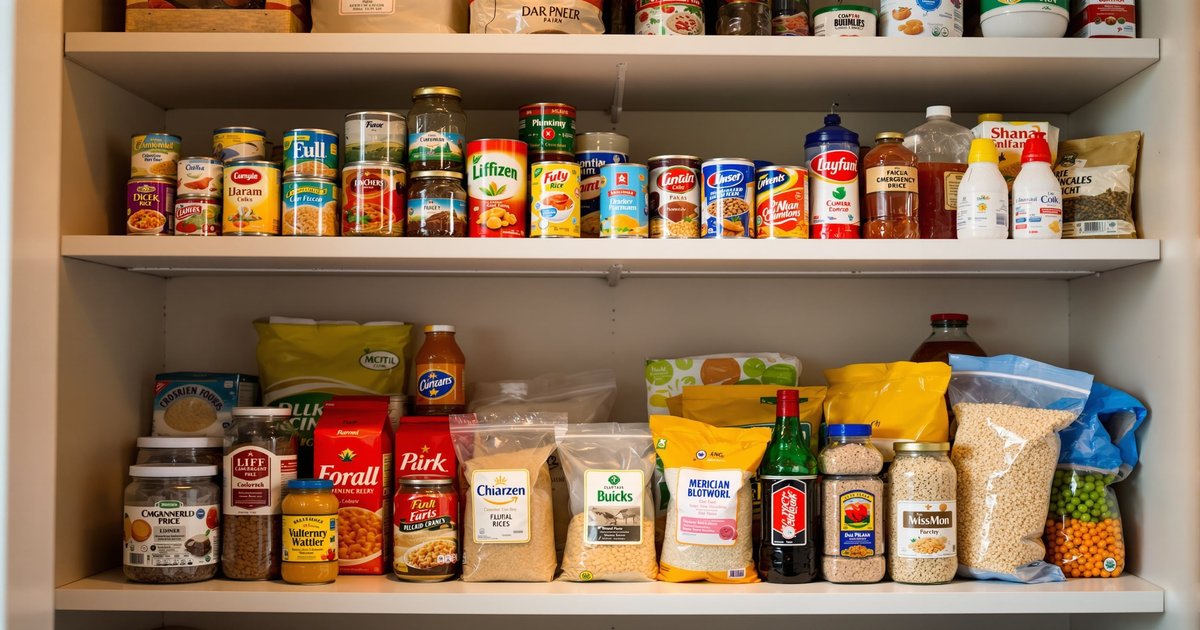
    Best Foods for Apartment Storage

    Not all shelf-stable foods are equal. For long term food storage urban apartments demand, you need items that score high on four criteria: calorie density, shelf life, compact size, and minimal preparation.

    Staples With Long Shelf Life

    • White rice — up to 30 years in Mylar bags with oxygen absorbers; ~1,600 cal/lb
    • Dried beans and lentils — 25+ years properly stored; ~1,500 cal/lb
    • Rolled oats — 20+ years in sealed containers; ~1,700 cal/lb
    • Powdered milk — 20 years sealed; adds protein and calcium to meals
    • Honey — indefinite shelf life; natural sweetener and energy source

    Canned Goods (2–5 Year Shelf Life)

    • Canned chicken, tuna, and salmon — high protein, ready to eat
    • Canned beans (black, kidney, pinto) — protein and fiber, no cooking needed
    • Canned vegetables (corn, green beans, carrots) — essential nutrients
    • Canned fruit in juice — quick energy and morale boost
    • Canned soups and stews — complete meals in a single container

    High-Calorie Compact Options

    • Peanut butter — ~2,700 cal/jar, no refrigeration needed once opened short-term
    • Trail mix and mixed nuts — ~2,600 cal/lb, excellent snacking calories
    • Protein bars and granola bars — individually wrapped, easy rotation
    • Freeze-dried meals — 25-year shelf life, lightweight, one pouch per meal
    • Hard crackers and hardtack — shelf-stable bread substitute

    The American Red Cross also recommends keeping comfort foods and familiar snacks in your supply. Morale matters during extended emergencies.

    No-Cook Emergency Foods

    If the power goes out and you have no camp stove, you need foods that are ready to eat straight from the package. Building a no-cook layer into your emergency food supply apartment plan is critical. Here are the best options:

    • Canned beans, tuna, chicken, and vegetables — fully cooked, eat cold or at room temperature
    • Peanut butter + crackers — filling and satisfying without any preparation
    • Dried fruit (raisins, apricots, mangoes) — natural sugars for quick energy
    • Nuts and seeds — calorie-dense, healthy fats, long shelf life
    • Shelf-stable milk or plant milk boxes — drink straight or add to cereal
    • Pouched tuna or chicken salad kits — complete meal in one package
    • Applesauce cups and fruit cups — easy to eat, good for all ages
    • Beef or turkey jerky — high protein, lightweight, long-lasting
    • Cereal or granola — eat dry or with shelf-stable milk
    • Energy gels or chews — fast calories in a medical or high-stress situation

    Aim for at least three full days of no-cook food in your supply. This covers the most common short-duration emergencies and buys time if you need to arrange cooking alternatives. For more on handling power outages, check out our blackout preparedness apartment guide.

    Space-Saving Storage Hacks

    Limited square footage is the biggest challenge for apartment food storage. The trick is to look at your space differently. Almost every apartment has hidden storage capacity once you start thinking vertically and creatively.

    Under-Bed Storage

    Flat, wheeled bins under each bed can hold an enormous amount of food. A standard queen bed offers roughly 30 cubic feet of under-bed space. Use clear bins so you can see contents at a glance,

    🍽️ Best Emergency Food Kits for Apartments

    We’ve evaluated dozens of freeze-dried and dehydrated food kits specifically for apartment storage. Here are our top picks that balance nutrition, shelf life, and compact size.

    See Our Top Food Kit Recommendations →

    Affiliate Disclosure: We may earn a commission from purchases made through these links.

    and label each with its expiration date.

    Vertical and Door Space

    • Over-the-door shoe organizers — perfect for pouches, bars, seasoning packets, and small cans
    • Stackable shelf risers — double the usable space inside kitchen cabinets
    • Wall-mounted narrow shelving — 4-inch-deep shelves between studs hold cans single-file
    • Tension rods in cabinets — create extra hanging or dividing layers

    Dual-Purpose Furniture

    Storage ottomans, bench seats with lift-up lids, and hollow coffee tables can all hold food supplies while serving their normal function. A storage ottoman can fit 20–30 cans plus several pouched meals.

    Closet Optimization

    Dedicate one section of a closet — even just two square feet of floor space — to emergency supplies. Stack bins vertically and use the shelf above for lighter items like oats and pasta. This alone can hold a two-week supply for one person.

    Vacuum Sealing and Repackaging

    Remove bulky packaging. Vacuum-seal rice, beans, oats, and pasta into flat packs that slide into narrow gaps. Mylar bags with oxygen absorbers offer the same benefit with dramatically longer shelf life. This single step can reduce storage volume by 30–50%.

    Apartment Emergency Food Checklist

    Use this prepping food list as your shopping and stocking reference. Check off items as you acquire them and note expiration dates for rotation.

    Grains and Carbohydrates

    • ☐ White rice — 10 lbs (sealed)
    • ☐ Rolled oats — 5 lbs (sealed)
    • ☐ Pasta — 5 lbs (various shapes)
    • ☐ Crackers — 4 boxes or sleeves
    • ☐ Instant mashed potatoes — 2 boxes
    • ☐ Cereal or granola — 2 boxes

    Proteins

    • ☐ Canned tuna — 8 cans
    • ☐ Canned chicken — 6 cans
    • ☐ Canned beans (assorted) — 12 cans
    • ☐ Peanut butter — 2 jars (16 oz each)
    • ☐ Beef jerky — 4 bags
    • ☐ Powdered milk — 1 large canister

    Fruits and Vegetables

    • ☐ Canned vegetables (assorted) — 10 cans
    • ☐ Canned fruit in juice — 6 cans
    • ☐ Dried fruit (raisins, apricots) — 3 bags
    • ☐ Applesauce cups — 1 pack (6 count)
    • ☐ Freeze-dried vegetables — 2 pouches

    Fats, Snacks, and Extras

    • ☐ Trail mix or mixed nuts — 3 bags
    • ☐ Protein bars — 12 bars
    • ☐ Honey — 1 bottle
    • ☐ Cooking oil — 1 small bottle
    • ☐ Salt, pepper, basic spices
    • ☐ Coffee or tea (instant) — for morale
    • ☐ Hard candy or chocolate — small bag

    Essentials

    • ☐ Manual can opener (at least 2)
    • ☐ Disposable plates, utensils, cups
    • ☐ Resealable bags and plastic wrap
    • ☐ Camp stove with fuel (if building allows) or Sterno cans
    • ☐ Water — minimum 1 gallon per person per day

    7-Day Emergency Food Plan

    This sample plan provides roughly 1,800–2,200 calories per day for one adult using items from the checklist above. Adjust portions for your household size.

    Day 1

    • Breakfast: Oatmeal with dried fruit and honey (400 cal)
    • Lunch: Peanut butter on crackers, trail mix (650 cal)
    • Dinner: Canned chicken with rice, canned corn (600 cal)
    • Snacks: Protein bar, applesauce cup (350 cal)

    Day 2

    • Breakfast: Cereal with powdered milk, dried apricots (400 cal)
    • Lunch: Tuna salad kit with crackers, mixed nuts (600 cal)
    • Dinner: Canned bean soup, instant mashed potatoes (550 cal)
    • Snacks: Jerky, fruit cup (400 cal)

    Day 3

    • Breakfast: Instant oatmeal with peanut butter and honey (500 cal)
    • Lunch: Canned beans and canned vegetables, crackers (550 cal)
    • Dinner: Pasta with canned chicken and canned tomatoes (600 cal)
    • Snacks: Granola bar, dried fruit (350 cal)

    Day 4

    • Breakfast: Granola with shelf-stable milk (400 cal)
    • Lunch: Peanut butter and honey on crackers, jerky (650 cal)
    • Dinner: Canned stew with rice (600 cal)
    • Snacks: Trail mix, hard candy (350 cal)

    Day 5

    • Breakfast: Oatmeal with mixed nuts and honey (450 cal)
    • Lunch: Canned tuna with crackers, canned fruit (550 cal)
    • Dinner: Rice and canned beans with spices (600 cal)
    • Snacks: Protein bar, applesauce (350 cal)

    Day 6

    • Breakfast: Cereal with powdered milk, raisins (400 cal)
    • Lunch: Canned chicken salad with crackers, nuts (600 cal)
    • Dinner: Instant mashed potatoes with canned vegetables and tuna (600 cal)
    • Snacks: Jerky, dried mango (400 cal)

    Day 7

    • Breakfast: Peanut butter oatmeal with dried fruit (500 cal)
    • Lunch: Canned soup, crackers with peanut butter (550 cal)
    • Dinner: Pasta with canned beans and canned tomato sauce (600 cal)
    • Snacks: Protein bar, trail mix (400 cal)

    This plan mixes no-cook and simple-prep meals. On days when cooking is not possible, substitute any meal with no-cook alternatives like canned proteins, crackers, and nut butters.

    Mistakes to Avoid

    Even well-intentioned preppers make errors that undermine their emergency food supply apartment plans. Here are the most common ones:

    1. Storing Food You Never Eat

    If you do not eat canned sardines on a regular day, you will not want them during a crisis. Stock foods your household actually enjoys. This also makes rotation natural — you eat the oldest items and replace them.

    2. Ignoring Water Needs

    Many emergency foods — rice, oats, pasta, freeze-dried meals — require water to prepare. If you do not have water stored, half your food supply becomes useless. Plan for one gallon of water per person per day, and read our urban water storage guide for apartment-specific solutions.

    3. Forgetting to Rotate Stock

    Canned goods and packaged foods expire. Set a calendar reminder every six months to check dates, move older items to the front, and consume anything approaching its expiration. Replace what you use.

    4. Neglecting Nutrition Balance

    Carbs are easy to stockpile, but a diet of only rice and crackers will leave you weak. Include protein sources (canned meats, beans, nuts), fats (peanut butter, oil), and vitamins (canned fruits and vegetables, multivitamins).

    5. Storing Everything in One Spot

    A single leak or pest incident can wipe out a concentrated supply. Distribute your food across at least two or three locations in your apartment — kitchen cabinets, bedroom closet, under-bed bins.

    6. Skipping a Can Opener

    This sounds obvious, but it is one of the most overlooked items. Buy at least two manual can openers and store them with your food. Electric openers are useless during a power outage.

    7. Not Accounting for Dietary Needs

    Allergies, intolerances, medications that require food, infant formula, and pet food all need separate planning. Build your prepping food list around your household’s actual needs, not a generic checklist.

    Frequently Asked Questions

    How much emergency food should I store in my apartment?

    Plan for a minimum of 2,000 calories per person per day. For a two-week supply for one adult, that means roughly 28,000 calories total. Focus on calorie-dense, shelf-stable foods that fit in compact spaces like closets, under-bed bins, and vertical shelving.

    What are the best no-cook emergency foods for apartments?

    The best no-cook emergency foods include canned beans, tuna, chicken, and vegetables; peanut butter; crackers; dried fruit and nuts; protein bars; ready-to-eat pouched meals like tuna salad kits; shelf-stable milk; and individually wrapped snack packs. These require zero preparation and no water to consume.

    How do I store emergency food in a small apartment without wasting space?

    Use vertical space with over-the-door organizers and stackable bins. Store food under beds in flat containers, inside ottomans or bench seats, and on top of cabinets. Vacuum-seal items to reduce bulk, and rotate stock using a first-in-first-out system. Even a studio apartment can hold a two-week food supply with smart organization.

    How long does emergency food last in an apartment?

    Shelf life varies by food type. Canned goods last 2–5 years. White rice and dried beans last up to 30 years when stored properly in Mylar bags with oxygen absorbers. Freeze-dried meals typically last 25 years. Peanut butter and crackers last 1–2 years. Always check dates and rotate stock every 6 months.

    Can I build an emergency food supply on a budget?

    Yes. Start small by adding a few extra shelf-stable items to each grocery trip — canned beans, rice, oats, and peanut butter are inexpensive and calorie-dense. A basic two-week supply for one person can cost as little as $75–$120 when built gradually over a few months.

    Start Building Your Supply Today

    You do not need a bunker or a big budget. A reliable emergency food supply apartment setup starts with one trip to the grocery store and a little creative organizing. Pick five items from the checklist above, find a spot to stash them, and you are already ahead of most people.

    For a broader look at apartment-based readiness — from water and power to communication plans — explore our full urban preparedness guide. Preparation done now is stress you will not feel later.

    📦 Ready to Build Your Emergency Food Supply?

    Start with a 72-hour kit and build up to a 30-day supply. Our recommended starter kits are specifically chosen for apartment-sized storage.

    Shop Emergency Food Kits →

    As an Amazon Associate, we earn from qualifying purchases. See our full disclaimer.

  • Urban Water Storage Guide for Apartments (2026)

    Urban Water Storage Guide for Apartments (2026)

    If you live in an apartment, urban water storage probably isn’t the first thing on your mind. But when a pipe bursts, a boil-water notice drops, or a natural disaster knocks out municipal supply, the tap stops working for everyone — renters included. The good news: you don’t need a basement or a backyard to build a reliable emergency water supply. This guide breaks down exactly how much water to store, which containers work in tight spaces, and how to keep your supply fresh — all tailored for urban preparedness in apartments and condos.

    Quick Water Storage Rules

    • Minimum: 1 gallon per person per day (FEMA / CDC guideline)
    • Realistic target: 1.5–2 gallons per person per day for drinking, cooking, and hygiene
    • Baseline goal: 3-day supply per household member
    • Better goal: 14-day (2-week) supply per household member
    • Rotation schedule: Every 6 months for self-filled containers; check expiry for store-bought
    • Storage temp: 50 °F–70 °F, away from sunlight and chemicals
    • Containers: Food-grade plastic only — no milk jugs, no glass

    How Much Water Do You Need Per Person?

    Both FEMA and the CDC recommend storing at least one gallon of water per person per day. That covers basic drinking and minimal sanitation. But “one gallon” is a survival floor, not a comfort level. Here’s a more practical breakdown:

    • Drinking: 0.5–1 gallon per day (more in summer or if you’re active)
    • Cooking / food prep: ~0.5 gallon per day
    • Basic hygiene (hand-washing, brushing teeth): ~0.5 gallon per day
    • Sanitation (flushing, cleaning): ~0.5 gallon per day

    That puts a realistic daily need closer to 1.5–2 gallons per person. For a two-person household aiming at a 14-day supply, that’s 42–56 gallons. Sounds like a lot? It is — but spread across several storage spots in an apartment, it’s completely doable.

    Adjust for Your Household

    Certain household members need more water than the baseline:

    • Nursing mothers: Add 0.5–1 gallon per day
    • Children under 5: Slightly less volume, but never cut below 0.5 gallon/day
    • Anyone on medication or ill: Plan for extra hydration needs
    • Pets: Dogs need roughly 1 oz per pound of body weight daily; cats need about half that
    • Hot climates: Increase your estimate by 50 % during summer months

    Figuring out how much water to store per person is the foundation of every apartment water storage plan. Get this number right first, then work backward to containers and space.

    Best Containers for Urban Water Storage

    Not every container is safe for long-term water storage. The wrong material can leach chemicals, harbor bacteria, or simply fall apart. Here are the best options ranked by practicality for apartment dwellers.

    Top Picks for Apartments

    1. Store-bought bottled water (cases of 16.9 oz or 1-gallon jugs) — The simplest option. Commercially sealed, long shelf life (1–2 years), easy to stack. Buy a case every grocery trip until you hit your target.
    2. 5-gallon food-grade water jugs — Widely available at camping and surplus stores. Compact enough for a closet floor, heavy enough to stay put. Look for BPA-free HDPE (recycling symbol #2).
    3. 7-gallon Aqua-Tainer or similar rigid containers — Designed specifically for water storage. Built-in spigots make dispensing easy without contamination.
    4. WaterBricks (3.5-gallon stackable blocks) — Modular, stackable, and built for tight spaces. You can configure them like building blocks under a desk or along a wall.
    5. Collapsible water bladders (5–7 gallons) — Fold flat when empty. Great for renters who move frequently or want a backup they can toss in a closet.

    Containers to Avoid

    • Milk jugs: Residual proteins breed bacteria no matter how well you clean them
    • Juice containers: Sugars left behind cause the same problem
    • Glass bottles: Heavy, fragile, and dangerous in an earthquake or blackout
    • Non-food-grade plastics: May leach harmful chemicals over months
    • Any container that previously held chemicals: Bleach bottles, detergent jugs, pesticide containers — never reuse these

    💧 Recommended Water Storage Solutions

    Based on our extensive research and testing, these are the top-rated water storage containers for apartment preppers. Compact, BPA-free, and built for long-term storage.

    View Top Water Containers on Amazon →

    As an Amazon Associate, we earn from qualifying purchases. This helps support our research at no extra cost to you.

    If you’re filling your own containers, sanitize them first: mix 1 teaspoon of unscented liquid household bleach (5 %–9 % sodium hypochlorite) per quart of water, swish to coat all surfaces, wait 30 seconds, pour it out, and air-dry before filling.

    Where to Store Water in Small Apartments

    Space is the biggest obstacle for apartment water storage. The trick is thinking vertically and using dead zones — areas that already exist but hold nothing useful. Here are proven spots:

    High-Value Storage Locations

    • Under beds: A twin bed frame can hide 10–20 gallons in flat WaterBricks or cases of bottled water. This is the single best spot in most apartments.
    • Closet floors: Two 5-gallon jugs per closet adds up fast — a coat closet and a bedroom closet give you 20 gallons without losing hanging space.
    • Behind furniture: The gap between a couch and the wall, or behind a bookshelf, can fit a row of 1-gallon jugs.
    • Inside a bench or ottoman: Hollow storage furniture does double duty. Line the inside with a few WaterBricks.
    • Top of kitchen cabinets: If there’s a gap between your cabinets and the ceiling, use it for sealed gallon jugs or boxed water.
    • Laundry area / utility closet: A 7-gallon container beside the water heater barely takes up floor space.
    • Pantry shelves: Dedicate one shelf to water — cases of bottled water integrate naturally with food storage. Consider pairing this with your emergency food supply for a complete kit.

    Weight Considerations

    Water weighs about 8.3 pounds per gallon. A 56-gallon, two-week supply for two people tips the scale at roughly 465 pounds. That weight needs to be distributed — don’t dump it all in one spot on an upper floor. Spread containers across multiple rooms, and keep heavy jugs on the floor or low shelves, never on high racks that could topple.

    Also check your lease. Most standard apartment leases don’t restrict water storage, but if you’re storing more than 50 gallons in one room, it’s worth confirming your renter’s insurance covers water damage just in case a container leaks.

    Water Rotation & Shelf Life

    Stored water doesn’t “expire” the way food does — water molecules don’t go bad. What happens is the container degrades, the seal weakens, or contaminants grow. Here’s how to keep your supply safe to drink.

    Rotation Schedule by Container Type

    • Commercially bottled water: Follow the printed expiration date, typically 1–2 years from manufacture
    • Self-filled food-grade containers (tap water): Rotate every 6 months
    • Tap water treated with bleach (8 drops per gallon): Good for up to 12 months; rotate annually
    • Water with commercial preservative additive: Can last up to 5 years; inspect every 2 years

    How to Rotate Without Wasting Water

    Rotation doesn’t mean pouring water down the drain. Use a first-in, first-out approach:

    1. Label every container with the fill date using a permanent marker
    2. When rotation day comes, use the oldest water for plants, cooking, cleaning, or pet bowls
    3. Refill the emptied containers with fresh tap water
    4. Move the newly filled containers to the back; older ones stay in front
    5. Set a recurring calendar reminder every 6 months so you never forget

    Signs Your Stored Water Has Gone Bad

    If you notice any of the following, purify or discard the water:

    • Cloudy or discolored appearance
    • Musty, sulfuric, or chemical smell
    • Floating particles or sediment
    • Slimy film on inside container walls
    • Container is cracked, bulging, or the seal is broken

    Emergency Water Backup Options

    Even the best emergency water supply apartment plan can fall short if a crisis lasts longer than expected. Build redundancy with these backup methods:

    1. Water Filtration

    A portable gravity filter (like a Berkey or Sawyer) can turn questionable tap water or rainwater into safe drinking water. These don’t require electricity — a huge advantage during a power outage. Keep one alongside your stored water as a force multiplier.

    2. Water Purification Tablets

    Iodine or chlorine dioxide tablets weigh almost nothing and can treat water from any freshwater source. A single bottle of 50 tablets can purify 25 gallons. Toss a bottle in your emergency kit as a last-resort option.

    3. Your Water Heater Tank

    Most apartment water heaters hold 30–50 gallons of drinkable water. In an emergency, turn off the power or gas to the heater, let it cool, then open the drain valve at the bottom into a clean container. This is water you already have — you just need to know it’s there.

    4. Bathtub Bladder (WaterBOB)

    If you get advance warning of an incoming emergency (hurricane, winter storm), a bathtub bladder lets you fill your tub with up to 100 gallons of clean water in minutes. The bladder keeps the water sealed and sanitary — far better than an open tub.

    5. Boiling

    If you have a gas stove or a camping stove, boiling is the most reliable way to kill pathogens. Bring water to a rolling boil for 1 full minute (3 minutes above 6,500 feet elevation). Boiling won’t remove chemicals or heavy metals, but it handles biological contaminants effectively.

    Common Mistakes to Avoid

    Most apartment water storage failures come down to a handful of repeated errors. Avoid these and you’ll be ahead of 90 % of people:

    1. Storing water near chemicals. Plastic absorbs fumes. Water stored next to cleaning supplies, paint, or gasoline under the sink can become contaminated even if the container is sealed. Always keep water separate from household chemicals.
    2. Using the wrong containers. Recycled milk jugs are the most common mistake. They breed bacteria. Use only food-grade containers rated for long-term storage.
    3. Forgetting to rotate. Water stored for two years in a reused soda bottle is a liability, not an asset. Set a phone reminder and follow the 6-month rule for self-filled containers.
    4. Storing everything in one spot. If a pipe leak or earthquake damages one storage area, you lose everything. Spread your supply across at least two rooms.
    5. Ignoring weight distribution. A 5-gallon jug weighs over 40 pounds. Placing multiple heavy containers on a single shelf or rickety furniture is asking for a collapse — and a flood.
    6. No backup plan. Stored water is step one, not the whole plan. Without a filter, purification tablets, or knowledge of alternative sources, you’re stuck when your supply runs out.
    7. Waiting for “the right time.” Emergencies don’t send calendar invites. Start with a single case of bottled water this week. You can optimize your apartment water storage setup over the following months.

    Frequently Asked Questions

    How much water should I store per person in an apartment?

    Store at least 1 gallon per person per day as a minimum. For realistic comfort — covering drinking, cooking, and hygiene — plan for 1.5 to 2 gallons per person per day. A 14-day supply for one person is 14–28 gallons, which fits easily under a bed or in a closet.

    Can I store water in plastic bottles long term?

    Yes, but only in food-grade plastic containers (BPA-free HDPE, recycling symbol #2). Commercially sealed bottled water lasts 1–2 years. Self-filled containers should be rotated every 6 months. Never reuse milk jugs, juice containers, or non-food-grade plastics for water storage.

    Where is the best place to store water in a small apartment?

    Under beds is the single most efficient spot — you can store 10–20 gallons in flat containers without losing any living space. Closet floors, behind furniture, the tops of kitchen cabinets, and hollow storage ottomans are also excellent choices. Distribute weight across multiple rooms.

    Does stored water go bad?

    Water itself doesn’t expire, but containers degrade over time, seals can weaken, and contaminants can grow. Store water between 50 °F and 70 °F in a dark location, and rotate self-filled containers every 6 months. If stored water looks cloudy, smells off, or the container is damaged, purify or discard it.

    What should I do if I run out of stored water during an emergency?

    Use your water heater tank (30–50 gallons of drinkable water), a portable gravity filter for available water sources, or water purification tablets. Boiling water for 1 minute kills most pathogens. Having at least one backup method alongside your stored supply is essential for apartment preparedness.

    🏆 Our #1 Pick for Apartment Water Storage

    After testing 15+ water storage solutions, the WaterBrick stackable containers remain our top recommendation for apartment preppers — space-efficient, durable, and BPA-free.

    Check Current Price on Amazon →

    Affiliate links help support this site at no cost to you. See our editorial policy.

  • Urban Situational Awareness: How to Spot Threats Before They Happen

    Urban Situational Awareness: How to Spot Threats Before They Happen

    Urban situational awareness is the single most important survival skill you can develop as a city dweller in 2026. Unlike gear or supplies that can be purchased, urban situational awareness is a mindset and skill set that must be practiced and refined over time. This guide teaches you how to develop urban situational awareness that helps you spot threats before they materialize — keeping you and your family safe in any metropolitan environment.

    Whether you’re commuting on public transit, walking through a parking garage, or simply going about your daily routine, urban situational awareness transforms you from a potential victim into someone who sees danger coming and takes action before it arrives.

    What Is Urban Situational Awareness?

    Urban situational awareness is the practice of being consciously alert to your surroundings, understanding what’s normal in your environment, and recognizing deviations that could signal danger. It’s not paranoia — it’s informed alertness that allows you to make better decisions faster.

    In military and law enforcement circles, urban situational awareness is considered the foundation of personal security. For civilian urban preppers, it’s equally critical because it costs nothing, requires no equipment, and works in every situation.

    Cooper’s Color Code: The Foundation of Urban Situational Awareness

    Colonel Jeff Cooper developed the Color Code system that remains the gold standard for teaching urban situational awareness. Understanding these levels helps you calibrate your alertness appropriately:

    Condition White — Unaware and Unprepared

    In Condition White, you have zero urban situational awareness. You’re absorbed in your phone, wearing noise-canceling headphones, or mentally checked out. This is the state most urban residents live in — and it’s the state that makes you most vulnerable. The goal of developing urban situational awareness is to spend as little time in Condition White as possible when in public.

    Condition Yellow — Relaxed Alert

    Condition Yellow is the ideal baseline for urban situational awareness. You’re relaxed but aware of your surroundings. You notice who’s around you, what they’re doing, and whether anything seems out of place. This state is sustainable for extended periods without causing fatigue or anxiety.

    This is where you should live when in public spaces. Condition Yellow urban situational awareness means you’re scanning your environment naturally, not staring at your phone, and maintaining awareness of exits and potential threats.

    Condition Orange — Specific Alert

    In Condition Orange, your urban situational awareness has identified a specific potential threat. Something has triggered your attention — a person behaving unusually, a vehicle that doesn’t belong, or a situation that feels wrong. You’re now focused on that specific concern and developing a response plan.

    Condition Red — Action Required

    Condition Red means your urban situational awareness has confirmed a threat and you’re executing your response plan. This could mean changing your route, entering a safe location, calling for help, or defending yourself.

    7 Urban Situational Awareness Techniques for City Dwellers

    Technique 1: Establish Your Baseline

    The most powerful urban situational awareness technique is baseline recognition. Every environment has a “normal” — the typical sights, sounds, behaviors, and patterns that characterize it. When something deviates from the baseline, your urban situational awareness flags it for attention.

    To establish baselines:

    • Notice the typical foot traffic patterns in your neighborhood at different times
    • Learn which vehicles are normally parked on your street
    • Observe the usual behavior of people in your regular locations (coffee shop, gym, transit stop)
    • Pay attention to normal sounds — construction, traffic patterns, neighborhood activity

    Technique 2: Practice the OODA Loop

    The OODA Loop (Observe, Orient, Decide, Act) is a decision-making framework that enhances urban situational awareness:

    1. Observe — Continuously scan your environment for information
    2. Orient — Process what you observe against your baseline knowledge
    3. Decide — Determine if action is needed and what that action should be
    4. Act — Execute your decision quickly and decisively

    The faster you cycle through the OODA Loop, the more effective your urban situational awareness becomes. Practice speeds up this cycle until it becomes nearly automatic.

    Technique 3: Read Body Language

    Urban situational awareness relies heavily on reading nonverbal cues. In city environments, body language often reveals intent before action occurs:

    • Target glancing — Someone repeatedly looking at you, your bag, or your phone
    • Predatory positioning — A person positioning themselves between you and exits
    • Concealment behavior — Hands hidden in pockets or behind objects
    • Grooming cues — Touching the face, adjusting clothing (can indicate nervousness before action)
    • Pack behavior — Multiple people coordinating movements or exchanging signals

    Technique 4: Use Reflective Surfaces

    Experienced practitioners of urban situational awareness use reflective surfaces to monitor their surroundings without turning around:

    • Store windows and glass doors
    • Car mirrors and windows
    • Phone screens (held at an angle)
    • Polished metal surfaces

    This technique allows you to check behind you naturally without alerting anyone that you’re practicing urban situational awareness.

    Technique 5: Map Your Exits

    Every time you enter a new space, your urban situational awareness should automatically identify:

    • All exits (including emergency exits, windows, and service doors)
    • Cover positions (solid objects that stop bullets or debris)
    • Concealment positions (objects that hide you from view)
    • The fastest route from your current position to the nearest exit

    This habit takes seconds to develop and could save your life in an active threat situation.

    Technique 6: Monitor Transitional Spaces

    Urban situational awareness is most critical in transitional spaces — areas where you move between environments and are most vulnerable:

    • Parking garages — Limited visibility, echo distortion, multiple hiding spots
    • Elevators and stairwells — Confined spaces with limited escape options
    • Building entrances and exits — Predictable movement patterns
    • ATMs — Distracted, carrying cash, predictable location
    • Public transit platforms — Crowded, noisy, multiple approach angles

    Heighten your urban situational awareness to Condition Orange when entering any transitional space.

    Technique 7: Trust Your Instincts

    Your subconscious processes environmental information faster than your conscious mind. When something feels wrong — even if you can’t articulate why — your urban situational awareness is working. Trust that feeling and take action:

    • Cross the street if someone makes you uncomfortable
    • Leave a location if the atmosphere changes
    • Take a different route if something feels off
    • Don’t enter an elevator with someone who triggers your instincts

    The social pressure to be “polite” gets people hurt. Your urban situational awareness instincts exist for a reason — honor them.

    Urban Situational Awareness in Specific Scenarios

    On Public Transportation

    Public transit requires heightened urban situational awareness due to confined spaces and unpredictable passengers. Sit or stand near exits, keep bags close to your body, avoid noise-canceling headphones, and be aware of who boards and exits at each stop.

    While Walking City Streets

    Street-level urban situational awareness means walking with purpose, making brief eye contact (showing you’re alert), staying off your phone, and varying your routes to avoid predictable patterns. The grey man strategy complements street awareness by helping you avoid drawing attention.

    In Your Apartment Building

    Apply urban situational awareness in your own building: notice unfamiliar faces, check stairwells before entering, be alert in laundry rooms and parking areas, and report suspicious activity. Combine awareness with proper apartment security devices for comprehensive protection.

    During an Urban Emergency

    Urban situational awareness becomes critical during emergencies when normal social rules break down. Monitor crowd behavior for signs of panic, identify safe routes away from danger, and watch for both threats and opportunities (open stores, available shelter, helpful individuals). Your urban survival guide knowledge combined with strong situational awareness gives you a significant advantage.

    Training Your Urban Situational Awareness

    Like any skill, urban situational awareness improves with deliberate practice. Here are exercises to sharpen your awareness:

    Daily Practice Exercises

    1. The Kim’s Game — Study a room for 30 seconds, then look away and list everything you remember. Practice daily to improve observational memory.
    2. People counting — When entering a space, quickly count the number of people and note their general positions. Check your count periodically.
    3. Exit mapping — In every new location, identify all exits within 10 seconds of entry.
    4. Baseline journaling — Spend 5 minutes daily noting what’s “normal” in your regular environments.
    5. Phone-free walks — Take one walk per day without looking at your phone. Focus entirely on your surroundings.

    Common Urban Situational Awareness Mistakes

    1. Smartphone addiction — The #1 killer of urban situational awareness. Your phone is a voluntary blindfold.
    2. Headphone isolation — Noise-canceling headphones eliminate your auditory awareness entirely.
    3. Normalcy bias — Assuming “it won’t happen here” despite evidence to the contrary.
    4. Awareness fatigue — Trying to maintain Condition Orange constantly leads to burnout. Condition Yellow is sustainable.
    5. Tunnel vision — Focusing on one potential threat while missing others.

    Frequently Asked Questions About Urban Situational Awareness

    How is urban situational awareness different from paranoia?

    Urban situational awareness is calm, informed alertness based on observation and knowledge. Paranoia is irrational fear without evidence. Practicing urban situational awareness at Condition Yellow means you’re relaxed but observant — you notice things without being anxious about them. If awareness causes you constant anxiety, you’re operating at too high an alert level.

    How long does it take to develop good urban situational awareness?

    Most people notice significant improvement in their urban situational awareness within 2-4 weeks of deliberate practice. The key habits — exit mapping, baseline recognition, and phone-free observation — become automatic within 60-90 days of consistent practice.

    Can children learn urban situational awareness?

    Yes. Age-appropriate urban situational awareness training helps children recognize unsafe situations and respond appropriately. Focus on teaching them to identify trusted adults, recognize when something feels wrong, and know what to do in emergency situations. Frame it as “being smart” rather than “being scared.”

    Does urban situational awareness work against all threats?

    Urban situational awareness significantly reduces your vulnerability to most common urban threats including street crime, pickpocketing, assault, and scams. However, no awareness level provides complete protection against all threats. The goal is to reduce risk and improve response time, not achieve invulnerability.

    Integrating Urban Situational Awareness Into Your Preparedness Plan

    Urban situational awareness is the foundation that makes all other preparedness strategies more effective. When combined with proper city home defense, a well-stocked emergency kit, and a comprehensive prepper checklist, your urban situational awareness creates a complete security posture that protects you in any scenario.

    Start practicing today. Put your phone in your pocket during your next walk, scan your environment, and notice what you’ve been missing. Urban situational awareness is free, portable, and always available — making it the most valuable tool in your urban survival toolkit.

  • 10 Best Apartment Security Devices for Renters (Non-Permanent)

    10 Best Apartment Security Devices for Renters (Non-Permanent)

    Finding the right apartment security devices is essential for renters who want to protect their homes without violating lease agreements. In 2026, the market for apartment security devices has exploded with renter-friendly options that require zero permanent modifications — no drilling, no wiring, and no landlord permission needed.

    This guide reviews the 10 best apartment security devices for renters, covering everything from smart cameras and door sensors to portable locks and alarm systems. Every product on this list can be installed in minutes and removed without a trace when you move.

    Why Renters Need Specialized Apartment Security Devices

    Renters face unique security challenges that homeowners don’t. You can’t install hardwired alarm systems, replace locks without permission, or make structural modifications. Yet apartment dwellers are statistically more likely to experience break-ins than homeowners — making apartment security devices not just convenient but necessary.

    The good news? Modern apartment security devices are designed specifically for renters. Wireless technology, adhesive mounting, and battery power have eliminated the need for permanent installation. You can build a comprehensive security system using apartment security devices that move with you from lease to lease.

    The 10 Best Apartment Security Devices for Renters (2026)

    1. Ring Alarm Security Kit (8-piece) — Best Overall Apartment Security Device

    The Ring Alarm system is the gold standard among apartment security devices. The 8-piece kit includes a base station, keypad, contact sensor, motion detector, and range extender — everything you need for comprehensive apartment protection.

    Why it’s #1:

    • Completely wireless — all components use adhesive mounting
    • Optional 24/7 professional monitoring for $20/month
    • Integrates with Ring cameras and video doorbell
    • Cellular backup ensures protection even if Wi-Fi goes down
    • Battery-powered sensors last up to 3 years
    • Easy DIY setup in under 30 minutes

    Price: $199.99 (kit) + optional $20/month monitoring

    2. Wyze Cam v4 — Best Budget Security Camera

    Among apartment security devices, the Wyze Cam v4 offers unbeatable value. Full 2K resolution, color night vision, and local storage via microSD card — all for under $36.

    Key features:

    • 2K QHD resolution with color night vision
    • Two-way audio with siren
    • Motion and sound detection with phone alerts
    • Local storage (microSD) — no subscription required for basic features
    • Magnetic base — sticks to any metal surface without mounting

    Price: $35.99

    3. Ring Video Doorbell (Battery) — Best Apartment Doorbell Camera

    A video doorbell is one of the most impactful apartment security devices you can install. The battery-powered Ring Video Doorbell requires no wiring and can be mounted with the included adhesive bracket or over your existing peephole.

    Key features:

    • 1080p HD video with two-way talk
    • Motion-activated alerts sent to your phone
    • Night vision and wide-angle lens
    • Rechargeable battery lasts 6-12 months
    • No wiring required — perfect for apartments

    Price: $99.99

    4. Addalock Portable Door Lock — Best Physical Security Device

    The Addalock is one of the simplest yet most effective apartment security devices available. This portable door lock installs in seconds from inside your apartment, preventing the door from being opened even with a key.

    Key features:

    • Installs in seconds — no tools required
    • Works on virtually any inward-opening door
    • Prevents entry even with a key (protection against unauthorized landlord entry)
    • TSA-friendly — doubles as a travel lock
    • Completely invisible from outside

    Price: $24.99

    For comprehensive door security strategies, see our city home defense guide which covers door reinforcement in detail.

    5. SimpliSafe 5-Piece Security System — Best Monitored Apartment Security Device

    SimpliSafe has built its reputation on apartment-friendly security. Among monitored apartment security devices, it offers the best combination of features, flexibility, and no-contract pricing.

    Key features:

    • No contract required — cancel anytime
    • Professional monitoring from $17.99/month
    • Cellular connection (works without Wi-Fi)
    • 24-hour battery backup
    • All sensors are wireless and adhesive-mounted
    • Environmental monitoring (smoke, CO, water leak, temperature)

    Price: $199.96 (system) + $17.99-$27.99/month monitoring

    6. GE Personal Security Window/Door Alarm (4-pack) — Best Budget Door/Window Alarm

    These standalone apartment security devices are the most affordable way to add alarm protection to every entry point. Each unit is self-contained with its own 120dB siren.

    Key features:

    • 120dB alarm — loud enough to alert neighbors and deter intruders
    • Adhesive mounting — no drilling
    • Battery powered — no wiring needed
    • On/off switch and chime mode
    • Works on doors and windows

    Price: $24.99 (4-pack)

    7. Kasa Smart Plug with Light Timer — Best Deterrence Device

    Smart plugs are underrated apartment security devices. By automating your lights to turn on and off on a schedule, you create the appearance of occupancy even when you’re away.

    Key features:

    • Schedule lights, radios, or TVs to simulate presence
    • Control via app from anywhere
    • Works with Alexa and Google Home
    • Away mode randomizes on/off times for realistic patterns
    • No hub required

    Price: $14.99 (2-pack)

    8. BudgetBuddy Door Security Bar — Best Door Reinforcement Device

    Door security bars are essential apartment security devices that prevent forced entry through your front door. The adjustable bar braces between your door handle and the floor, making it nearly impossible to kick in.

    Key features:

    • Adjustable length fits any standard door
    • Padded base grips any floor surface
    • Withstands up to 350 pounds of force
    • No installation — place and remove in seconds
    • Works on any inward-opening door

    Price: $25-35

    9. Eve Window Guard — Best Smart Window Sensor

    Window sensors are critical apartment security devices, especially for ground-floor units. The Eve Window Guard uses Thread/Matter technology for reliable, low-latency alerts.

    Key features:

    • Detects open/closed/tilted window positions
    • Works with Apple HomeKit, Google Home, and Amazon Alexa
    • Adhesive mounting — no drilling
    • Battery lasts up to 18 months
    • Automation triggers (turn off AC when window opens, etc.)

    Price: $39.99

    10. Tile Mate Tracker (for Keys and Valuables) — Best Anti-Theft Tracking Device

    While not a traditional security device, Tile trackers are valuable apartment security devices for protecting portable valuables. Attach them to laptops, bags, and other high-value items for tracking if stolen.

    Key features:

    • Bluetooth tracking with 250-foot range
    • Community find network for out-of-range items
    • Loud ring to locate items
    • Water-resistant design
    • 1-year replaceable battery

    Price: $24.99

    How to Build a Complete Apartment Security System

    The most effective approach combines multiple apartment security devices into a layered system. Here’s a recommended setup by budget:

    Budget Setup ($75-100)

    • GE door/window alarms (4-pack) — $25
    • Addalock portable door lock — $25
    • Wyze Cam v4 — $36
    • Kasa smart plugs (2-pack) — $15

    Mid-Range Setup ($250-350)

    • Ring Alarm 8-piece kit — $200
    • Ring Video Doorbell — $100
    • Door security bar — $30
    • Smart plugs for light automation — $15

    Premium Setup ($500-700)

    • SimpliSafe system with monitoring — $200 + monthly
    • Ring Video Doorbell — $100
    • Multiple Wyze cameras — $108
    • Eve window sensors (3) — $120
    • Addalock + door security bar — $55
    • Tile trackers for valuables — $50

    Apartment Security Devices: Installation Tips for Renters

    Getting the most from your apartment security devices requires proper placement:

    1. Cameras — Position to cover entry points. Avoid pointing at neighboring units (privacy concerns).
    2. Door sensors — Place on the door frame, not the door itself, for more reliable contact.
    3. Motion detectors — Mount in corners at 6-7 feet height for optimal coverage. Avoid pointing at windows (false alarms from passing traffic).
    4. Video doorbell — Mount at chest height (4-4.5 feet) for the best facial capture angle.
    5. Window sensors — Prioritize ground-floor and fire-escape-accessible windows.

    Legal Considerations for Apartment Security Devices

    Before installing apartment security devices, be aware of these legal considerations:

    • Lease review — Check your lease for restrictions on security equipment, especially exterior-mounted devices
    • Camera placement — Recording common areas may be restricted; never point cameras into other units
    • Noise ordinances — Ensure alarm sirens comply with local noise regulations
    • Landlord notification — Some leases require notifying your landlord about security system installation
    • Removal obligation — Plan to remove all apartment security devices and repair any minor damage when you move

    Frequently Asked Questions About Apartment Security Devices

    What are the best apartment security devices that don’t require drilling?

    The best no-drill apartment security devices include the Ring Alarm system (adhesive sensors), Wyze Cam v4 (magnetic base), Addalock portable door lock (no installation), and GE window/door alarms (adhesive mount). All of these apartment security devices can be installed and removed without leaving any marks.

    Do apartment security devices work without Wi-Fi?

    Some apartment security devices work without Wi-Fi. The SimpliSafe system uses cellular backup, standalone door/window alarms work independently, and physical devices like the Addalock and door security bars require no connectivity at all. However, smart cameras and app-controlled devices do require Wi-Fi for full functionality.

    Can my landlord object to apartment security devices?

    Landlords generally cannot prohibit interior apartment security devices that don’t cause damage. However, exterior-mounted devices (like video doorbells) may require permission. Always check your lease and communicate with your landlord about any visible apartment security devices.

    How much should I spend on apartment security devices?

    A basic but effective apartment security device setup costs $75-100. A comprehensive system with monitoring runs $300-500 plus monthly fees. Start with the highest-impact apartment security devices (door lock, camera, and alarm) and expand over time.

    Are apartment security devices worth the investment?

    Absolutely. Studies show that visible apartment security devices reduce break-in risk by 50-60%. Even basic deterrence devices like cameras and alarm stickers significantly reduce your chances of being targeted. The cost of apartment security devices is minimal compared to the financial and emotional cost of a break-in.

    Next Steps for Apartment Security

    Apartment security devices are one component of a comprehensive urban preparedness strategy. Combine your security setup with strong urban situational awareness, a well-stocked apartment emergency kit, and the strategies outlined in our urban survival guide.

    For more advanced physical security measures, including door reinforcement and safe room setup, read our complete city home defense guide. And use our urban prepper checklist to ensure your apartment security devices are part of a complete preparedness plan.

  • The Grey Man Strategy: How to Blend In During an Urban Crisis

    The Grey Man Strategy: How to Blend In During an Urban Crisis

    The grey man strategy is one of the most valuable yet underappreciated skills in urban survival. In a crisis — whether it’s civil unrest, a natural disaster, or an economic collapse — being visibly prepared can make you a target. The grey man strategy teaches you to blend seamlessly into your environment, moving through urban spaces without attracting attention, confrontation, or unwanted interest.

    This comprehensive guide covers every aspect of the grey man strategy for city dwellers in 2026, from clothing and body language to gear concealment and behavioral techniques that keep you invisible when visibility could be dangerous.

    What Is the Grey Man Strategy?

    The grey man strategy is the practice of making yourself unremarkable and forgettable in any environment. The name comes from the concept of being “grey” — neither black (threatening) nor white (vulnerable), but completely neutral and unnoticeable. When you execute the grey man strategy effectively, people’s eyes pass over you without registering your presence.

    In urban survival contexts, the grey man strategy serves several critical purposes:

    • Avoid becoming a target — Criminals and desperate people target those who appear to have resources
    • Move freely during crises — Blend with crowds to navigate dangerous areas
    • Protect your supplies — Conceal the fact that you’re prepared when others aren’t
    • Reduce confrontation risk — People don’t confront what they don’t notice
    • Maintain operational security — Keep your preparedness level private

    The Psychology Behind the Grey Man Strategy

    The grey man strategy works because of how human attention functions. Our brains are wired to notice things that stand out — unusual clothing, confident movement in a panicked crowd, tactical gear, or any deviation from the environmental baseline. The grey man strategy exploits this by ensuring you match every aspect of your environment’s baseline.

    Understanding urban situational awareness helps you implement the grey man strategy more effectively. The same observation skills that help you spot threats also help you understand what “normal” looks like in any given environment — which is exactly what you need to mimic.

    Grey Man Strategy: Clothing and Appearance

    The Rules of Grey Man Clothing

    Clothing is the most visible element of the grey man strategy. Follow these principles:

    1. Match your environment — Wear what the majority of people around you wear. In a business district, that means business casual. In a residential neighborhood, casual everyday clothing.
    2. Avoid tactical and military gear — Nothing screams “I’m prepared” louder than 5.11 pants, MOLLE backpacks, and combat boots. The grey man strategy requires civilian-looking alternatives.
    3. Choose neutral colors — Grey, navy, khaki, brown, and muted tones. Avoid bright colors, bold patterns, or anything memorable.
    4. Avoid logos and branding — Distinctive logos make you memorable. The grey man strategy demands forgettable clothing.
    5. Dress for the weather appropriately — Wearing a heavy jacket on a warm day draws attention. Match the weather.

    Grey Man Strategy Wardrobe Essentials

    • Plain grey or navy t-shirts and long-sleeve shirts
    • Standard jeans or khaki pants (not cargo pants with visible tactical features)
    • Neutral-colored sneakers or casual shoes (not hiking boots or combat boots)
    • A plain baseball cap or beanie (changes your silhouette and partially conceals your face)
    • A nondescript jacket appropriate for the season
    • A regular-looking backpack or messenger bag (not a tactical pack)

    Grey Man Strategy: Body Language and Behavior

    Clothing is only half the grey man strategy. Your behavior and body language must also blend with your environment.

    Movement Principles

    • Match the pace of those around you — Walking faster or slower than the crowd draws attention
    • Avoid purposeful scanning — Practice situational awareness subtly, using peripheral vision and reflective surfaces
    • Mirror the emotional state of the crowd — If people are anxious, appear anxious. If calm, appear calm. Emotional mismatch is highly noticeable.
    • Don’t make prolonged eye contact — Brief, natural eye contact is normal. Staring or avoiding all eye contact both draw attention.
    • Avoid confident, military-style posture — Relaxed, slightly slouched posture is more common and less memorable.

    Behavioral Rules

    1. Don’t display knowledge or competence — In a crisis, appearing to know what you’re doing marks you as someone with resources and training
    2. Avoid leadership behavior — Don’t organize, direct, or take charge in public during a crisis
    3. Don’t eat or drink in public when others can’t — Nothing breaks the grey man strategy faster than eating when everyone else is hungry
    4. Keep conversations minimal and generic — Don’t discuss your preparations, supplies, or plans with strangers
    5. Use technology normally — Looking at your phone occasionally is normal; never looking at it or constantly checking it both stand out

    Grey Man Strategy: Concealing Your Gear

    A critical component of the grey man strategy is concealing your preparedness gear in plain sight.

    The Grey Man Bug-Out Bag

    Your bug-out bag should look like an ordinary commuter bag. The grey man strategy demands:

    • Use a standard backpack — JanSport, Herschel, or any common brand. Avoid anything with MOLLE webbing, tactical patches, or military styling.
    • Keep it reasonably sized — An oversized pack draws attention. A normal-looking 25-35L daypack is ideal.
    • Conceal tactical items — Wrap tools in clothing, use internal organizers, and avoid anything visible through mesh pockets.
    • Carry a decoy layer — Keep a laptop sleeve, book, or lunch container on top so a casual glance reveals nothing unusual.

    Everyday Carry (EDC) Concealment

    The grey man strategy extends to your everyday carry items:

    • Multi-tools that look like regular pocket knives or keychains
    • Flashlights that resemble pens or phone accessories
    • First aid supplies in a regular toiletry bag
    • Water purification tablets in a vitamin bottle
    • Emergency cash distributed across multiple pockets

    Grey Man Strategy in Different Urban Scenarios

    During Civil Unrest

    The grey man strategy is most critical during civil unrest. Avoid protest areas, but if caught in one, match the crowd’s energy without participating. Move toward the edges of crowds where escape routes exist. Don’t wear anything that identifies you with any faction.

    During Natural Disasters

    After a natural disaster, the grey man strategy helps you avoid desperate individuals. Don’t display food, water, or supplies openly. Travel during low-traffic hours when possible. Appear as affected as everyone else, even if you’re well-prepared.

    During Evacuation

    The grey man strategy during evacuation means blending with the flow of evacuees. Don’t display expensive gear, don’t appear overly organized, and don’t draw attention to your vehicle’s supplies. Keep your emergency kit in nondescript containers.

    In Daily Life (OPSEC)

    The grey man strategy applies to everyday operational security too. Don’t advertise your preparedness on social media, don’t discuss your supplies with casual acquaintances, and don’t let delivery drivers see your stockpile. The grey man strategy is a lifestyle, not just a crisis response.

    Grey Man Strategy Mistakes That Get You Noticed

    1. The “tactical tourist” — Wearing one piece of tactical gear with civilian clothing. A single MOLLE pouch or tactical watch can undo your entire grey man strategy.
    2. Over-preparation visible — Carrying too much gear in a bag that’s obviously heavy and overstuffed.
    3. Physical fitness mismatch — Being noticeably more fit and capable than those around you during a crisis. Downplay your physical capabilities.
    4. Clean and well-fed appearance — During extended emergencies, appearing too clean or well-nourished breaks the grey man strategy.
    5. Vehicle tells — Tactical stickers, roof racks loaded with gear, or a vehicle that’s obviously prepared for off-grid travel.

    Advanced Grey Man Strategy Techniques

    The Chameleon Approach

    Advanced grey man strategy practitioners carry items that allow quick appearance changes:

    • A reversible jacket (two different colors/styles)
    • A hat that can be added or removed
    • Glasses (even non-prescription) that change your facial appearance
    • A different bag cover or stuff sack that changes your pack’s appearance

    Route Selection

    The grey man strategy extends to how you move through the city:

    • Avoid main thoroughfares where crowds and checkpoints concentrate
    • Use parallel side streets that offer the same direction with less exposure
    • Know your city’s alleyways, cut-throughs, and pedestrian paths
    • Avoid bottleneck points (bridges, tunnels, narrow streets) where you can be trapped

    Frequently Asked Questions About the Grey Man Strategy

    Is the grey man strategy the same as being a coward?

    No. The grey man strategy is a tactical decision to avoid unnecessary confrontation and preserve your resources for protecting your family. Military special forces use grey man principles extensively. It takes more discipline to remain unnoticed than to draw attention to yourself.

    Can women use the grey man strategy effectively?

    Absolutely. The grey man strategy applies equally to all genders. Women can implement the same principles of environmental matching, neutral clothing, baseline behavior, and gear concealment. The key is matching whatever is “normal” for your specific environment.

    How do I practice the grey man strategy?

    Practice the grey man strategy during daily activities. Try to move through a crowded area without anyone making eye contact or remembering you. Ask a friend to observe you in a public space and report what stands out. Gradually refine your approach based on feedback.

    Does the grey man strategy conflict with situational awareness?

    No — they complement each other perfectly. Urban situational awareness is practiced internally while the grey man strategy manages your external presentation. You can be highly alert while appearing completely unremarkable. The best practitioners of the grey man strategy are also the most situationally aware.

    Integrating the Grey Man Strategy Into Your Urban Survival Plan

    The grey man strategy is one component of a comprehensive urban preparedness approach. Combine it with solid city home defense, a complete urban survival guide knowledge base, and the practical steps in our urban prepper checklist.

    Remember: the best-prepared urban prepper is the one nobody suspects is prepared at all. That’s the essence of the grey man strategy — and it could be the difference between getting home safely and becoming a target during the next urban crisis.

  • The Urban Shield: A Professional Guide to City Home Defense

    The Urban Shield: A Professional Guide to City Home Defense

    City home defense is no longer optional for urban residents in 2026. With rising property crime rates in metropolitan areas, protecting your apartment or city home requires a strategic, layered approach that goes far beyond a simple deadbolt lock. This professional guide to city home defense covers everything you need to know — from hardening your entry points to building a complete urban security system.

    Whether you rent a studio apartment or own a townhouse, these city home defense strategies will help you create multiple layers of protection that deter, detect, delay, and defend against threats. Every recommendation in this guide has been tested in real urban environments and adapted for the unique challenges city dwellers face.

    Why City Home Defense Is Different from Rural Security

    City home defense presents unique challenges that rural homeowners never encounter. In dense urban environments, you’re dealing with shared walls, limited exterior space, building regulations, and proximity to potential threats. Understanding these differences is the first step toward effective city home defense.

    Urban homes typically have multiple vulnerability points: main entry doors, windows accessible from fire escapes, shared hallways, and parking garage access points. Unlike rural properties where distance provides a natural buffer, city homes require concentrated defensive layers within a compact space.

    The good news? Modern city home defense technology has evolved dramatically. Smart security systems, reinforced door hardware, and wireless alarm systems make it possible to create fortress-level protection without permanent modifications — perfect for renters and homeowners alike.

    The 4 Layers of Effective City Home Defense

    Professional security experts recommend a four-layer approach to city home defense. Each layer serves a specific purpose and works together to create comprehensive protection.

    Layer 1: Deterrence — Making Your Home a Hard Target

    The first layer of city home defense focuses on deterrence. Most urban criminals are opportunistic — they choose the easiest target available. Your goal is to make your home look like more trouble than it’s worth.

    • Visible security cameras — Even dummy cameras reduce break-in attempts by up to 50%
    • Smart lighting — Motion-activated lights at entry points signal an alert household
    • Security system signage — Display stickers from reputable alarm companies
    • Reinforced door frames — Visible strike plate reinforcement tells experienced criminals to move on

    For apartment dwellers, check out our guide on the best apartment security devices for renters for non-permanent deterrence options that won’t violate your lease.

    Layer 2: Detection — Early Warning Systems

    Detection is the second critical layer of city home defense. You need to know about threats before they reach your door. Modern detection systems for urban homes include:

    • Smart doorbell cameras — Ring, Nest, or Eufy doorbells provide 24/7 monitoring with motion alerts
    • Window and door sensors — Wireless sensors that alert your phone when opened
    • Glass break detectors — Acoustic sensors that detect the sound of breaking glass
    • Motion sensors — Interior PIR sensors for when you’re away
    • Smart locks with activity logs — Track every entry and exit with timestamps

    Developing strong urban situational awareness complements your electronic detection systems. Technology fails; trained observation skills don’t.

    Layer 3: Delay — Buying Time When It Matters

    If deterrence and detection fail, the delay layer of city home defense buys you critical time to respond. Every second counts during a home invasion, and these measures can add minutes to an intruder’s timeline:

    • Door reinforcement kits — Products like Door Armor or StrikeMaster II Pro can withstand multiple kicks
    • Security film on windows — 3M Safety Film holds glass together even after impact
    • Secondary locks — Chain locks, door bars, and floor-mounted door stops
    • Interior door reinforcement — Strengthen your bedroom door as a last line of defense

    Layer 4: Defense — Your Last Resort Plan

    The final layer of city home defense is your personal defense plan. This includes:

    • Safe room designation — Identify the most defensible room in your home (usually the master bedroom)
    • Communication plan — Keep a charged phone in your safe room; know your local emergency response times
    • Emergency supplies — Flashlight, first aid kit, and phone charger in your safe room
    • Family action plan — Everyone in the household should know exactly what to do

    🔒 Essential Security Gear We Recommend

    Strengthen your apartment security with these professional-grade tools. All items are renter-friendly — no permanent modifications required.

    Browse Security Equipment →

    Affiliate links help support this site at no cost to you.

    Door Reinforcement: The #1 City Home Defense Upgrade

    According to FBI statistics, over 65% of home burglaries involve forced entry through a door. This makes door reinforcement the single most impactful city home defense upgrade you can make.

    How to Reinforce Your Front Door

    Most apartment and city home doors fail at three points: the strike plate, the door frame, and the hinges. Here’s how to address each weakness:

    1. Upgrade the strike plate — Replace the standard 1-inch screws with 3.5-inch screws that anchor into the wall stud. Install a reinforced strike plate that distributes force across a larger area.
    2. Reinforce the door frame — Door frame reinforcement kits wrap the vulnerable areas with steel plates. The Door Armor MAX kit is the gold standard for city home defense.
    3. Secure the hinges — Replace hinge screws with 3.5-inch versions. Add hinge pins or security studs to prevent door removal.
    4. Add a door bar or security bar — Floor-mounted door bars like the Buddybar provide incredible resistance against forced entry.
    5. Install a smart deadbolt — Grade 1 deadbolts with smart features give you both strength and convenience.

    This entire upgrade can be completed in under two hours and costs less than $150 — making it the best return on investment for city home defense.

    Window Security for Urban Apartments

    Windows are the second most common entry point for urban break-ins. City home defense for windows requires a different approach depending on your floor level and window type.

    Ground Floor and Fire Escape Windows

    These are your highest-risk windows. Effective city home defense measures include:

    • Window security film — Apply 8-mil or thicker security film to hold glass together after impact
    • Window locks and pins — Add secondary locks that prevent windows from being opened more than a few inches
    • Window alarms — Vibration-sensing alarms that trigger when glass is disturbed
    • Security bars (removable) — Quick-release interior bars that provide maximum protection while allowing emergency egress

    Upper Floor Windows

    While less vulnerable, upper floor windows still need attention in your city home defense plan:

    • Window sensors connected to your alarm system
    • Locking mechanisms on all accessible windows
    • Privacy film to prevent visual surveillance of your home’s interior

    Smart Home Security Systems for City Home Defense

    Modern smart home security has revolutionized city home defense. The best systems for urban environments in 2026 offer:

    Top Recommended Systems

    1. SimpliSafe — No contract, easy installation, perfect for renters. Includes door/window sensors, motion detectors, and 24/7 monitoring.
    2. Ring Alarm Pro — Integrates with Ring cameras and doorbells for a complete ecosystem. Built-in Wi-Fi 6 router with backup internet.
    3. Abode — Highly customizable with support for Z-Wave, Zigbee, and HomeKit devices. Great for tech-savvy urban preppers.

    When choosing a system for city home defense, prioritize: cellular backup (in case internet is cut), battery backup (for power outages), and professional monitoring with fast police dispatch.

    Building a Safe Room in Your City Home

    A safe room is the ultimate city home defense feature. In an urban setting, you don’t need a purpose-built bunker — you need a reinforced room that buys you time until help arrives.

    Converting a Bedroom into a Safe Room

    1. Reinforce the door — Install a solid-core door with a Grade 1 deadbolt and door reinforcement kit
    2. Stock emergency supplies — First aid kit, flashlight, charged phone, water, and any necessary medications
    3. Install communication — Keep a landline or charged cell phone; consider a two-way radio
    4. Add a secondary lock — A door bar or barricade device provides additional security

    Your safe room should be part of your broader urban survival strategy. Build your apartment emergency kit and keep critical supplies in your designated safe room.

    City Home Defense on a Budget

    You don’t need thousands of dollars for effective city home defense. Here’s a prioritized budget plan:

    Under $50: Essential Basics

    • Door reinforcement screws (3.5-inch) — $8
    • Door security bar — $25
    • Window pins/locks — $12
    • Security system stickers/signs — $5

    Under $200: Solid Protection

    • Everything above, plus:
    • Door frame reinforcement kit — $75
    • Smart doorbell camera — $60
    • Window/door alarm sensors (4-pack) — $30

    Under $500: Comprehensive Defense

    • Everything above, plus:
    • Complete smart security system with monitoring — $200
    • Window security film — $50
    • Smart deadbolt lock — $150

    City Home Defense for Renters

    Renters face unique city home defense challenges — you can’t make permanent modifications, and you need portable solutions. The good news is that most modern security products are designed with renters in mind.

    Key renter-friendly city home defense products include:

    • Portable door locks — Travel locks that work from inside without modification
    • Adhesive-mount cameras — No drilling required
    • Wireless alarm systems — Completely removable when you move
    • Door reinforcement bars — No installation needed

    For a complete list of renter-approved security products, see our detailed guide on apartment security devices for renters.

    Common City Home Defense Mistakes to Avoid

    Even well-intentioned city home defense efforts can backfire. Avoid these common mistakes:

    1. Relying on a single layer — A camera without an alarm, or a lock without reinforcement, leaves gaps
    2. Ignoring the human element — Technology supplements awareness; it doesn’t replace it
    3. Forgetting about fire safety — Security measures must allow emergency egress
    4. Neglecting digital security — Smart home devices need strong passwords and updated firmware
    5. Not testing your systems — Monthly tests ensure everything works when you need it

    City Home Defense Checklist

    Use this checklist to assess and improve your city home defense posture:

    • ☐ Front door reinforced (strike plate, frame, hinges)
    • ☐ Deadbolt installed (Grade 1 or 2)
    • ☐ All windows have secondary locks
    • ☐ Security system installed and monitored
    • ☐ Cameras covering entry points
    • ☐ Motion-activated exterior lighting
    • ☐ Safe room designated and stocked
    • ☐ Family emergency plan established
    • ☐ Neighbors aware of your security setup
    • ☐ Monthly system tests scheduled

    Download our complete urban prepper checklist for a comprehensive 30-90 day action plan that includes city home defense alongside other preparedness priorities.

    Frequently Asked Questions About City Home Defense

    What is the most effective city home defense upgrade?

    Door reinforcement is the most effective city home defense upgrade. Since over 65% of break-ins occur through doors, reinforcing your strike plate, door frame, and hinges with a kit like Door Armor MAX provides the highest return on investment for under $100.

    Can renters implement city home defense measures?

    Yes, renters can implement effective city home defense using non-permanent solutions like portable door locks, wireless alarm systems, adhesive-mount cameras, and door security bars. Most modern security products require no drilling or permanent modification.

    How much does a complete city home defense system cost?

    A comprehensive city home defense system costs between $300 and $800 for most urban apartments. This includes door reinforcement ($75-150), a smart security system ($150-300), cameras ($60-200), and window security measures ($50-100).

    Do smart security systems work during power outages?

    Quality smart security systems include battery backup that lasts 24-48 hours and cellular communication backup. Systems like SimpliSafe and Ring Alarm Pro continue operating during power outages, which is essential for reliable city home defense.

    What should I keep in my safe room?

    Your city home defense safe room should contain: a charged cell phone or landline, flashlight with extra batteries, first aid kit, water bottles, any necessary medications, a door barricade device, and a list of emergency contacts including local police non-emergency and emergency numbers.

    Final Thoughts on City Home Defense

    Effective city home defense is about creating multiple layers of protection that work together. No single product or strategy provides complete security — but a well-planned combination of deterrence, detection, delay, and defense measures can make your urban home significantly safer.

    Start with the highest-impact upgrades (door reinforcement and a basic alarm system), then build out your city home defense over time. Combine physical security with strong situational awareness habits and a solid urban survival plan for comprehensive protection.

    Remember: the goal of city home defense isn’t to build an impenetrable fortress. It’s to make your home a harder target than the alternatives, detect threats early, and buy yourself time to respond effectively. With the strategies in this guide, you’re well on your way to achieving exactly that.

    🛡️ Complete Your Home Defense Setup

    Don’t leave gaps in your security. Our recommended bundle includes door reinforcement, window alarms, and a smart camera — all apartment-friendly.

    See Complete Security Bundle →

    As an Amazon Associate, we earn from qualifying purchases. See our editorial policy.

  • Urban Prepper Checklist (2026): Your 30-90 Day Action Plan

    Urban Prepper Checklist (2026): Your 30-90 Day Action Plan

    📥 Want this checklist as a printable PDF?

    This urban prepper checklist provides a systematic 30-90 day action plan for city dwellers who want to build comprehensive emergency preparedness without overwhelm. Unlike generic survival checklists, this urban prepper checklist is specifically designed for apartment living — accounting for limited space, rental restrictions, and the unique threats that metropolitan residents face.

    Follow this urban prepper checklist phase by phase, and within 90 days you’ll have a complete preparedness system that covers water, food, security, medical, communication, and evacuation planning. Each item includes priority level, estimated cost, and links to detailed guides for deeper implementation.

    How to Use This Urban Prepper Checklist

    This urban prepper checklist is organized into three phases:

    • Phase 1 (Days 1-30) — Critical foundations. These items address immediate survival needs and should be completed first.
    • Phase 2 (Days 31-60) — Expanded capabilities. Build on your foundation with deeper preparedness across all categories.
    • Phase 3 (Days 61-90) — Advanced preparedness. Fine-tune your systems, add redundancy, and develop skills.

    Check off items as you complete them, and don’t skip phases. This urban prepper checklist is designed so each phase builds on the previous one.

    Phase 1: Urban Prepper Checklist — Days 1-30 (Critical Foundations)

    Water Security (Week 1)

    Water is the first priority on any urban prepper checklist. Complete these items in your first week:

    Food Security (Week 2)

    Emergency Kit Assembly (Week 3)

    • ☐ Build your apartment emergency kit using our kit builder tool
    • ☐ Purchase LED headlamp and flashlight with extra batteries
    • ☐ Buy a portable power bank (20,000+ mAh) and keep it charged
    • ☐ Assemble a basic first aid kit
    • ☐ Gather 30-day supply of prescription medications
    • ☐ Prepare a waterproof document bag with copies of IDs, insurance, and emergency contacts
    • ☐ Set aside $200+ in small-denomination cash

    Basic Security (Week 4)

    Phase 2: Urban Prepper Checklist — Days 31-60 (Expanded Capabilities)

    Extended Water and Food Supply

    • ☐ Expand water storage to 14-day supply
    • ☐ Purchase a WaterBOB bathtub bladder for surge water storage
    • ☐ Expand food stockpile to 14-day supply
    • ☐ Add comfort foods and morale items to your stockpile
    • ☐ Purchase an alternative cooking method (butane camp stove or Sterno)
    • ☐ Read our complete urban water and food security guide

    Enhanced Security

    • ☐ Install a wireless security system (Ring Alarm or SimpliSafe)
    • ☐ Add a video doorbell camera
    • ☐ Install window/door sensors on all entry points
    • ☐ Study our city home defense guide
    • ☐ Learn the grey man strategy for crisis situations
    • ☐ Designate a safe room and stock it with basic supplies

    Communication and Information

    • ☐ Purchase a NOAA weather radio (battery/hand-crank)
    • ☐ Buy FRS two-way radios for family communication
    • ☐ Create a family communication plan (rally points, out-of-area contact)
    • ☐ Sign up for local emergency alert systems
    • ☐ Download offline maps of your city and surrounding area

    Evacuation Planning

    • ☐ Identify 3 evacuation routes from your apartment (primary, secondary, on-foot)
    • ☐ Pack a go-bag (portable version of your emergency kit) weighing under 30 lbs
    • ☐ Establish family rally points at 3 distances (1 block, 1 mile, outside city)
    • ☐ Drive or walk each evacuation route at least once
    • ☐ Identify shelter locations along each route

    Phase 3: Urban Prepper Checklist — Days 61-90 (Advanced Preparedness)

    Extended Self-Sufficiency

    • ☐ Expand food stockpile to 30-day supply
    • ☐ Add freeze-dried meals for long-term storage
    • ☐ Purchase a portable power station (500Wh+) with solar panel
    • ☐ Add a second water purification method to your kit
    • ☐ Stock sanitation supplies (portable toilet, waste bags, disinfectant)

    Skills Development

    • ☐ Complete a first aid/CPR certification course
    • ☐ Practice using your water filter and purification methods
    • ☐ Cook a meal using only your emergency cooking equipment
    • ☐ Practice your evacuation plan with your household
    • ☐ Take a community emergency response team (CERT) course if available
    • ☐ Practice situational awareness exercises daily for 30 days

    Community and Redundancy

    • ☐ Exchange contact information with trusted neighbors
    • ☐ Discuss basic mutual aid with at least 2 neighbors
    • ☐ Add redundancy to critical systems (backup water filter, extra batteries, second flashlight)
    • ☐ Create a digital backup of all important documents (encrypted cloud storage)
    • ☐ Review and update your entire urban prepper checklist — identify and fill any gaps

    Urban Prepper Checklist: Ongoing Maintenance

    Completing this urban prepper checklist isn’t the end — it’s the beginning of ongoing preparedness maintenance:

    Monthly Tasks

    • ☐ Check power bank charge levels
    • ☐ Verify flashlight and radio function
    • ☐ Rotate any near-expiration food items into regular meals
    • ☐ Review local threat conditions and adjust plans if needed

    Quarterly Tasks

    • ☐ Test all electronic devices and replace batteries as needed
    • ☐ Check medication expiration dates and rotate stock
    • ☐ Update emergency contact information
    • ☐ Review and practice evacuation routes
    • ☐ Inventory all supplies against this urban prepper checklist

    Annual Tasks

    • ☐ Complete full inventory of all emergency supplies
    • ☐ Replace stored water
    • ☐ Update documents and digital backups
    • ☐ Reassess threats and adjust your urban prepper checklist accordingly
    • ☐ Review and update insurance coverage
    • ☐ Conduct a full household emergency drill

    Urban Prepper Checklist Budget Guide

    Completing this entire urban prepper checklist costs approximately $800-1,500 for a two-person household, spread over 90 days. Here’s the breakdown by phase:

    • Phase 1 (Days 1-30): $250-400 — Water storage, basic food, emergency kit essentials, basic security
    • Phase 2 (Days 31-60): $300-500 — Extended supplies, security system, communication equipment, evacuation gear
    • Phase 3 (Days 61-90): $250-600 — Extended food, power station, skills training, redundancy items

    You can reduce costs by purchasing items on sale, buying in bulk, and prioritizing the highest-impact items first. The urban prepper checklist is designed to be completed gradually — you don’t need to buy everything at once.

    Frequently Asked Questions About the Urban Prepper Checklist

    Can I complete this urban prepper checklist in less than 90 days?

    Yes, if budget allows, you can accelerate this urban prepper checklist significantly. The phases are designed to spread costs and prevent overwhelm, but motivated preppers with available funds can complete the entire urban prepper checklist in 30 days or less.

    What if I can only afford part of this urban prepper checklist?

    Focus on Phase 1 of this urban prepper checklist first — it covers the most critical survival needs (water, food, basic emergency kit) for under $400. Even completing just Phase 1 puts you ahead of 90% of urban residents in terms of emergency preparedness.

    Is this urban prepper checklist suitable for families with children?

    Yes. This urban prepper checklist covers the foundation that every household needs. For families with children, add child-specific items to each category: formula/baby food, diapers, children’s medications, comfort items, and age-appropriate activities for managing stress during emergencies.

    How do I store all these supplies in a small apartment?

    Use our prepper storage calculator to plan your storage layout. The most effective apartment storage locations are under beds, in closet floors, behind furniture, and inside storage ottomans. This urban prepper checklist is designed with apartment space constraints in mind.

    Start Your Urban Prepper Checklist Today

    The best time to start this urban prepper checklist was yesterday. The second best time is right now. Begin with Phase 1, Week 1 — securing your water supply — and work through the checklist systematically. Each completed item brings you closer to genuine preparedness.

    For detailed guidance on specific topics in this urban prepper checklist, explore our comprehensive guides: urban survival guide, water and food security, city home defense, and apartment emergency kit. Together with this urban prepper checklist, these resources give you everything you need to protect your household in any urban emergency.

  • Emergency Kit for Apartment (2026): 72-Hour Survival Setup for Small Spaces

    Emergency Kit for Apartment (2026): 72-Hour Survival Setup for Small Spaces

    Building an emergency kit for apartment living requires a different approach than traditional survival kits. Space is limited, weight matters if you need to evacuate, and your supplies must address urban-specific threats like power outages, water system failures, and building evacuations. This guide shows you exactly how to build a comprehensive emergency kit for apartment dwellers that fits in small spaces and covers 72 hours of self-sufficiency.

    Whether you live in a studio or a two-bedroom, this emergency kit for apartment guide provides a complete supply list, storage solutions, and customization options based on your household size and specific needs. Use our emergency kit builder tool to create a personalized checklist.

    Why Every Apartment Needs an Emergency Kit

    An emergency kit for apartment residents is essential because urban emergencies can isolate you from help for 72 hours or more. FEMA recommends every household maintain a minimum 72-hour emergency kit, but apartment dwellers face additional challenges:

    • No basement or garage storage — Your emergency kit for apartment use must fit in closets, under beds, or in compact containers
    • Elevator dependence — During power outages, you may need to carry your emergency kit for apartment evacuation down multiple flights of stairs
    • Shared building systems — Water, heat, and electricity failures affect the entire building simultaneously
    • Limited cooking options — Most apartments lack outdoor grilling space or fireplaces
    • Evacuation complexity — High-rise evacuations require portable, lightweight emergency kits

    Emergency Kit for Apartment: The Complete Supply List

    Category 1: Water (Most Critical)

    Water is the #1 priority in any emergency kit for apartment preparedness. Store a minimum of 1 gallon per person per day for 3 days.

    • 3 gallons of water per person (commercially bottled or stored in BPA-free containers)
    • Portable water filter — the Sawyer Squeeze or LifeStraw are ideal for emergency kits
    • Water purification tablets as backup (Aquatabs or Potable Aqua)
    • Collapsible water container (for collecting additional water if needed)

    Calculate your exact water needs with our emergency water storage calculator. For extended water security strategies, see our urban water and food security guide.

    Category 2: Food (72-Hour Supply)

    Your emergency kit for apartment food supply should prioritize no-cook, no-water options:

    • Energy bars and protein bars (12-18 per person for 3 days)
    • Canned food with pull-tab lids (tuna, chicken, fruit, vegetables)
    • Peanut butter and crackers
    • Trail mix and dried fruit
    • Instant oatmeal packets (if you have a way to heat water)
    • Hard candy and chocolate (morale and quick energy)
    • Manual can opener (if any cans lack pull-tabs)

    For a complete food stockpile plan beyond 72 hours, see our emergency food supply list and use our food supply calculator.

    Category 3: Light and Power

    Power outages are the most common urban emergency. Your emergency kit for apartment use must include:

    • LED headlamp (hands-free lighting is essential) — with extra batteries
    • LED flashlight (at least 200 lumens) — with extra batteries
    • Portable power bank (minimum 20,000 mAh) — keep charged
    • Battery-powered or hand-crank NOAA weather radio
    • Extra batteries (AA, AAA) in the sizes your devices use
    • Glow sticks (safe, no-heat light source — great for bathrooms)
    • USB charging cables for all household devices

    Category 4: First Aid and Medical

    A comprehensive first aid component is essential in any emergency kit for apartment preparedness:

    • Pre-made first aid kit (Adventure Medical Kits or similar)
    • Prescription medications (30-day supply, rotated regularly)
    • Over-the-counter medications: pain relievers, antihistamines, anti-diarrheal, antacids
    • Adhesive bandages (various sizes)
    • Gauze pads and medical tape
    • Antiseptic wipes and antibiotic ointment
    • Tweezers and scissors
    • Thermometer
    • Any personal medical devices (inhaler, EpiPen, glucose monitor)

    Category 5: Documents and Financial

    Your emergency kit for apartment evacuation must include critical documents:

    • Copies of IDs (driver’s license, passport) in a waterproof bag
    • Insurance documents (renter’s insurance, health insurance cards)
    • Emergency contact list (printed — don’t rely on your phone)
    • Cash in small denominations ($200-500 minimum)
    • USB drive with digital copies of all important documents
    • Lease agreement copy

    Category 6: Shelter and Warmth

    Even inside your apartment, heating failures during winter require preparation:

    • Emergency mylar blankets (2 per person) — compact and effective
    • Wool blanket or sleeping bag
    • Hand warmers (chemical activated)
    • Extra warm clothing layers (stored with your emergency kit)
    • Rain poncho (for evacuation in wet weather)

    Category 7: Sanitation and Hygiene

    When water systems fail, sanitation becomes critical. Your emergency kit for apartment use should include:

    • Portable toilet bags (with enzyme treatment)
    • Toilet paper (compressed/travel rolls)
    • Hand sanitizer (large bottle)
    • Disinfecting wipes
    • Garbage bags (heavy duty, multiple sizes)
    • Personal hygiene items (toothbrush, toothpaste, soap)
    • Feminine hygiene products

    Category 8: Tools and Safety

    • Multi-tool (Leatherman or similar)
    • Duct tape
    • Paracord (50 feet)
    • Work gloves
    • N95 masks (for smoke, dust, or airborne contaminants)
    • Whistle (for signaling if trapped)
    • Fire extinguisher (small, apartment-rated)
    • Wrench or pliers (for turning off gas if applicable)

    Category 9: Communication

    • NOAA weather radio (battery/hand-crank powered)
    • FRS two-way radios (pair) — for communicating with family when cell networks fail
    • Whistle (3 blasts = universal distress signal)
    • Permanent marker and paper (for leaving messages)

    Emergency Kit for Apartment: Storage Solutions

    The biggest challenge with an emergency kit for apartment living is storage. Here are proven solutions:

    The Two-Container System

    Organize your emergency kit for apartment use into two containers:

    1. Stay-Home Kit — A large plastic bin stored in a closet containing your full 72-hour supply. This is your primary emergency kit for apartment sheltering-in-place.
    2. Go-Bag — A backpack containing the most critical items from each category, ready to grab if you need to evacuate. This portable emergency kit for apartment evacuation should weigh no more than 25-30 pounds.

    Use our prepper storage calculator to ensure your emergency kit for apartment storage fits your available space.

    Best Storage Locations

    • Hall closet — Ideal for your Stay-Home Kit (near the front door for quick access)
    • Bedroom closet — Good for the Go-Bag (accessible at night)
    • Under the bed — Excellent for flat storage containers with water and food
    • Near the front door — Keep your Go-Bag where you can grab it during evacuation

    Customizing Your Emergency Kit for Apartment Living

    For Families with Children

    Add to your emergency kit for apartment families: diapers and wipes, formula or baby food, comfort items (stuffed animal, small toy), children’s medications, and activity items (coloring book, crayons) to manage stress.

    For Pet Owners

    Your emergency kit for apartment pet owners should include: 3 days of pet food and water, medications, leash/carrier, copies of vaccination records, and comfort items.

    For Seniors or Those with Medical Needs

    Customize your emergency kit for apartment medical needs: extra prescription medications (30-day supply), medical device batteries or chargers, mobility aids, large-print emergency instructions, and medical information cards.

    Emergency Kit for Apartment: Maintenance Schedule

    An emergency kit for apartment use requires regular maintenance to remain effective:

    • Monthly — Check power bank charge levels; rotate any perishable items
    • Quarterly — Test flashlights and radios; check medication expiration dates; update emergency contact list
    • Biannually — Replace water supply; check food expiration dates; update documents; replace batteries
    • Annually — Complete inventory check; replace expired items; update kit based on changed needs

    Frequently Asked Questions About Emergency Kits for Apartments

    How much does an emergency kit for apartment cost?

    A basic emergency kit for apartment preparedness costs $150-250 for one person. A comprehensive kit for two people runs $300-500. You can build your emergency kit for apartment use gradually over 2-3 months to spread the cost, starting with water, food, and light sources.

    Where should I store my emergency kit in a small apartment?

    The best locations for an emergency kit in a small apartment are: a hall closet (for your main supply bin), a bedroom closet (for your go-bag), and under the bed (for water and food storage). The key is keeping your emergency kit for apartment use accessible — not buried behind seasonal items.

    How often should I update my emergency kit for apartment use?

    Review your emergency kit for apartment preparedness quarterly for medication and battery checks, and do a complete inventory biannually. Water should be replaced every 6 months if stored in your own containers, and food items should be rotated using the FIFO rotation system.

    Should my emergency kit for apartment include weapons?

    This is a personal decision that depends on your training, local laws, and comfort level. At minimum, your emergency kit for apartment security should include items that serve dual purposes — a heavy flashlight, a multi-tool, and a door security bar. For comprehensive security planning, see our apartment security devices guide.

    Next Steps: Building Your Emergency Kit for Apartment Living

    Start building your emergency kit for apartment preparedness today. Use our emergency kit builder tool to generate a personalized checklist, then work through the categories in priority order: water, food, light/power, first aid, and documents.

    Your emergency kit for apartment living is one component of comprehensive urban preparedness. Combine it with city home defense, strong situational awareness, and the complete strategy outlined in our urban survival guide. Track your progress with our urban prepper checklist to ensure nothing falls through the cracks.

  • Urban Survival Guide (2026): 15 Critical Strategies for City Preppers

    Urban Survival Guide (2026): 15 Critical Strategies for City Preppers

    This urban survival guide covers the 15 most critical strategies every city prepper needs to master in 2026. Urban environments present unique survival challenges — limited space, dependence on infrastructure, dense populations, and restricted resources — that require specialized approaches different from traditional wilderness survival.

    Whether you’re a new prepper living in a studio apartment or an experienced survivalist in a city townhouse, this urban survival guide provides actionable, tested strategies that work in real metropolitan environments. Each strategy includes specific steps you can implement immediately to improve your preparedness.

    Why You Need an Urban Survival Guide in 2026

    Cities are incredibly efficient during normal times — but incredibly fragile during emergencies. An urban survival guide is essential because city dwellers face threats that rural residents don’t:

    • Infrastructure dependence — Water, electricity, gas, and sewage systems can fail simultaneously
    • Supply chain vulnerability — Grocery stores carry only 3 days of inventory on average
    • Population density — More people competing for fewer resources during a crisis
    • Limited storage space — Apartments restrict how much you can stockpile
    • Evacuation challenges — Traffic gridlock can make leaving a city nearly impossible

    This urban survival guide addresses each of these challenges with practical solutions designed for city living.

    Strategy 1: Secure Your Water Supply First

    Water is the #1 priority in any urban survival guide. You can survive weeks without food but only 3 days without water. In a city, your water supply is entirely dependent on municipal infrastructure.

    Immediate Actions

    Water security is so critical that our complete water and food security guide dedicates extensive coverage to urban water strategies.

    Strategy 2: Build a Smart Food Stockpile

    Every urban survival guide emphasizes food storage, but city preppers need to be strategic about what and how they store. Space is limited, so every item must earn its place.

    The Urban Prepper Food Strategy

    1. Calculate your needs with our emergency food supply calculator
    2. Build a 30-day emergency food supply using compact, calorie-dense foods
    3. Implement a FIFO food storage rotation system to prevent waste
    4. Store foods that require minimal water and no cooking (in case utilities fail)
    5. Include comfort foods — morale matters during extended emergencies

    Strategy 3: Harden Your Home

    Your apartment or home is your primary shelter in any urban survival guide scenario. Making it secure and sustainable during a crisis is essential.

    Follow our comprehensive city home defense guide to implement layered security. Key priorities include:

    • Reinforce entry doors with upgraded strike plates and door armor
    • Install a wireless security system with cellular backup
    • Secure windows with locks, film, and alarms
    • Designate a safe room with emergency supplies
    • Install apartment security devices appropriate for renters

    Strategy 4: Build a 72-Hour Emergency Kit

    No urban survival guide is complete without a properly stocked emergency kit. Your apartment emergency kit should sustain you for at least 72 hours — the minimum time before organized relief typically arrives.

    Use our emergency kit builder tool to create a customized kit based on your household size, location, and specific needs. Essential categories include:

    • Water and water purification
    • Food (no-cook options)
    • First aid and medications
    • Light and communication
    • Documents and cash
    • Shelter and warmth
    • Tools and sanitation

    Strategy 5: Develop Situational Awareness

    This urban survival guide strategy costs nothing but could save your life. Situational awareness is the practice of being alert to your surroundings and recognizing potential threats before they materialize.

    In urban environments, situational awareness means:

    • Knowing your neighborhood’s baseline — what’s normal and what’s not
    • Identifying exits and escape routes in every building you enter
    • Monitoring local news and emergency alerts
    • Recognizing pre-attack indicators in crowds
    • Maintaining awareness of your surroundings without paranoia

    Strategy 6: Master the Grey Man Concept

    The grey man strategy is a critical component of any urban survival guide. During a crisis, being visibly prepared can make you a target. The grey man approach teaches you to blend in with your environment, avoiding attention while maintaining your preparedness advantage.

    Key grey man principles for urban survival:

    • Dress to match your environment — avoid tactical or military-style clothing
    • Keep your supplies concealed in ordinary-looking bags
    • Avoid displaying wealth, weapons, or preparedness gear
    • Match the emotional state of those around you
    • Move with purpose but without urgency that draws attention

    Strategy 7: Create Multiple Evacuation Plans

    Every urban survival guide must address evacuation. In a city, you need multiple routes because your primary route may be blocked by traffic, debris, or danger zones.

    Evacuation Planning Steps

    1. Identify 3 evacuation routes — Primary (fastest), secondary (alternative), and tertiary (on foot)
    2. Pre-position supplies — Keep a bug-out bag ready at home and a smaller kit in your vehicle
    3. Establish rally points — Designate meeting locations for family members at increasing distances from home
    4. Know your triggers — Decide in advance what conditions will prompt evacuation vs. sheltering in place
    5. Practice your routes — Drive or walk each route at least twice per year

    Strategy 8: Establish Communication Protocols

    During urban emergencies, cell networks become overloaded within minutes. This urban survival guide recommends multiple communication methods:

    • Text messages — Use less bandwidth than calls and often get through when calls can’t
    • Two-way radios — FRS/GMRS radios work without cell infrastructure
    • Emergency radio — NOAA weather radio with hand-crank power for official updates
    • Out-of-area contact — Designate a friend or family member outside your city as a communication hub
    • Physical message board — Agree on a location where family members can leave physical messages

    Strategy 9: Learn Basic Medical Skills

    In an urban emergency, hospitals will be overwhelmed. This urban survival guide strongly recommends:

    • Take a certified first aid and CPR course
    • Learn to treat common emergency injuries: cuts, burns, fractures, and shock
    • Stock a comprehensive first aid kit with a 30-day supply of prescription medications
    • Learn basic wound closure techniques (butterfly bandages, wound glue)
    • Understand when to seek professional medical help vs. self-treat

    Strategy 10: Build Community Connections

    No urban survival guide should overlook the power of community. In a city, your neighbors are your most valuable resource during a crisis.

    • Get to know your immediate neighbors — at minimum, exchange phone numbers
    • Identify neighbors with useful skills (medical, mechanical, security)
    • Discuss basic mutual aid agreements — watching each other’s homes, sharing resources
    • Join or form a neighborhood emergency preparedness group
    • Participate in community emergency response team (CERT) training

    Strategy 11: Manage Power and Energy

    Power outages are among the most common urban emergencies. This urban survival guide recommends a tiered energy strategy:

    Tier 1: Immediate (0-24 hours)

    • Portable power banks (minimum 20,000 mAh) for phones and devices
    • LED flashlights and headlamps with extra batteries
    • Battery-powered or hand-crank radio

    Tier 2: Short-term (1-7 days)

    • Portable power station (like Jackery or EcoFlow) — 500Wh minimum
    • Solar panels for recharging (foldable, balcony-compatible)
    • Camp stove with fuel for cooking

    Tier 3: Extended (7+ days)

    • Larger solar setup with battery storage
    • Alternative cooking methods (rocket stove, solar oven)
    • Manual alternatives for electric-dependent tasks

    Strategy 12: Protect Important Documents

    This urban survival guide strategy is often overlooked but critical. During evacuations or home damage, you need access to essential documents:

    • Store digital copies of all important documents in encrypted cloud storage
    • Keep physical copies in a waterproof, fireproof document bag
    • Include: IDs, insurance policies, property deeds, medical records, bank information
    • Keep cash in small denominations ($1, $5, $10, $20) — ATMs won’t work without power
    • Store at least $500 in cash as part of your emergency supplies

    Strategy 13: Plan for Sanitation

    When water and sewer systems fail, sanitation becomes a serious health hazard. This urban survival guide addresses a topic most people ignore:

    • Stock heavy-duty garbage bags for waste containment
    • Keep a portable toilet or bucket toilet system with enzyme-based waste treatment
    • Store hand sanitizer, disinfecting wipes, and bleach for sanitation
    • Plan for trash management — garbage collection stops during major emergencies
    • Understand basic disease prevention in unsanitary conditions

    Strategy 14: Maintain Physical Fitness

    An often-neglected aspect of any urban survival guide is physical preparedness. During an emergency, you may need to:

    • Walk long distances carrying heavy supplies
    • Climb stairs in buildings without elevator service
    • Move debris or barricade doors
    • Carry injured family members
    • Endure physical stress for extended periods

    Regular cardiovascular exercise, strength training, and flexibility work are as important as any gear in your urban survival guide toolkit.

    Strategy 15: Follow the Urban Prepper Checklist

    The final strategy in this urban survival guide is to systematize your preparedness. Use our urban prepper checklist to track your progress across all 15 strategies. The checklist breaks preparedness into manageable 30-day, 60-day, and 90-day phases so you can build your readiness without overwhelm.

    Use our prepper storage calculator to ensure your supplies fit your available space — a critical consideration for apartment preppers.

    Frequently Asked Questions About Urban Survival

    What is the most important thing in an urban survival guide?

    Water security is the most important element of any urban survival guide. Without clean water, survival time drops to approximately 3 days. Prioritize water storage, filtration, and purification above all other preparations.

    How much does it cost to follow this urban survival guide?

    You can implement the basics of this urban survival guide for under $500, covering water storage, a basic food stockpile, emergency kit essentials, and home security basics. Full implementation across all 15 strategies typically costs $1,000-2,000 spread over several months.

    Can apartment renters follow this urban survival guide?

    Absolutely. This urban survival guide is specifically designed for city dwellers, including apartment renters. Every strategy includes renter-friendly options that don’t require permanent modifications or excessive storage space.

    How long should I prepare to survive without outside help?

    This urban survival guide recommends preparing for a minimum of 14 days of self-sufficiency. While most urban emergencies see relief within 72 hours, major disasters (like Hurricane Katrina or extended power grid failures) can leave residents without assistance for two weeks or more.

    Should I plan to evacuate or shelter in place?

    This urban survival guide recommends preparing for both scenarios. In most urban emergencies, sheltering in place is safer and more practical. However, certain threats (chemical spills, structural damage, flooding) require evacuation. Having plans for both options gives you maximum flexibility.

    Putting Your Urban Survival Guide Into Action

    Reading this urban survival guide is the first step — but knowledge without action doesn’t save lives. Start with the highest-priority strategies (water, food, emergency kit) and work through the remaining strategies over the next 90 days.

    Download our urban prepper checklist to track your progress, and explore our urban prepping blog for detailed guides on each strategy covered in this urban survival guide. Your future self will thank you for the preparation you start today.

  • Portable Water Filters Emergency (2026): Top 5 Compact Purifiers for Urban Survival

    Portable Water Filters Emergency (2026): Top 5 Compact Purifiers for Urban Survival

    Portable water filters for emergency situations are essential gear for every urban prepper in 2026. When municipal water systems fail — whether from natural disasters, infrastructure collapse, or contamination events — having a reliable portable water filter for emergency use can mean the difference between survival and a serious health crisis.

    This guide reviews the top 5 portable water filters for emergency preparedness, specifically chosen for urban survival scenarios. We’ve tested each filter for flow rate, contaminant removal, portability, and real-world reliability to help you choose the best portable water filters for emergency readiness.

    Why You Need Portable Water Filters for Emergency Preparedness

    The average person needs one gallon of water per day for drinking and basic hygiene. In an urban emergency, stored water runs out fast — especially in small apartments where storage space is limited. Portable water filters for emergency use allow you to purify water from virtually any freshwater source, dramatically extending your survival timeline.

    Use our emergency water storage calculator to determine exactly how much water your household needs, then supplement your stored supply with portable water filters for emergency backup.

    Common Urban Water Sources During Emergencies

    During an urban emergency, you may need to filter water from sources you’d never normally consider:

    • Bathtub and sink reserves — Fill these immediately when you learn of an emergency
    • Hot water heater tank — Contains 30-80 gallons of pre-heated water
    • Rainwater collection — Balcony or rooftop collection during rain events
    • Park ponds and fountains — Last resort, but filterable with the right equipment
    • Swimming pools — Chlorinated but may contain other contaminants

    Portable water filters for emergency situations can make all of these sources safe to drink. For additional purification methods, see our guide on how to purify water at home.

    How We Tested and Ranked These Portable Water Filters for Emergency Use

    Our evaluation criteria for portable water filters for emergency preparedness included:

    1. Filtration effectiveness — Must remove 99.99% of bacteria and 99.9% of protozoa minimum
    2. Flow rate — How quickly can you get clean water when you need it?
    3. Filter lifespan — Total gallons before replacement is needed
    4. Portability — Size and weight for bug-out bags and apartment storage
    5. Ease of use — Can you operate it under stress with minimal instructions?
    6. Durability — Will it survive rough handling during an emergency?
    7. Price-to-value ratio — Best protection per dollar spent

    Top 5 Portable Water Filters for Emergency Survival (2026)

    1. Sawyer Squeeze SP131 — Best Overall Portable Water Filter for Emergency Use

    The Sawyer Squeeze consistently ranks as the top portable water filter for emergency preparedness, and for good reason. Its hollow fiber membrane technology removes 99.99999% of bacteria and 99.9999% of protozoa — exceeding EPA standards.

    Key Specifications:

    • Filtration: 0.1 micron absolute hollow fiber membrane
    • Flow rate: Up to 1.7 liters per minute
    • Filter lifespan: Up to 100,000 gallons (with proper backwashing)
    • Weight: 3 oz (filter only)
    • Includes: 3 squeeze pouches, drinking straw, cleaning syringe

    Why it’s #1 for emergency use: The Sawyer Squeeze offers the best combination of filtration quality, flow rate, and lifespan of any portable water filter for emergency situations. Its 100,000-gallon capacity means you’ll likely never need a replacement filter, and the squeeze pouch system works without electricity or pumping.

    Urban prepper tip: Attach the Sawyer Squeeze inline to a hydration bladder for hands-free filtered water during evacuation scenarios.

    2. LifeStraw Personal — Best Budget Portable Water Filter for Emergency Kits

    The LifeStraw Personal is the most recognized portable water filter for emergency preparedness worldwide. Its simplicity makes it ideal for emergency kits where reliability under stress is paramount.

    Key Specifications:

    • Filtration: 0.2 micron hollow fiber membrane
    • Flow rate: 0.5 liters per minute (sip-based)
    • Filter lifespan: 1,000 gallons (4,000 liters)
    • Weight: 2 oz
    • No batteries, moving parts, or chemicals required

    Why it’s great for emergencies: At under $20, the LifeStraw is the most affordable portable water filter for emergency kits. Keep one in your apartment emergency kit, one in your car, and one in your bug-out bag.

    3. Katadyn BeFree 1.0L — Best Portable Water Filter for Emergency Speed

    The Katadyn BeFree offers the fastest flow rate of any portable water filter for emergency use in its class. The EZ-Clean membrane technology allows you to shake the filter clean without tools.

    Key Specifications:

    • Filtration: 0.1 micron hollow fiber membrane
    • Flow rate: Up to 2 liters per minute
    • Filter lifespan: 1,000 liters
    • Weight: 2.3 oz
    • Collapsible soft flask included

    Why it excels in emergencies: When you need clean water fast, the Katadyn BeFree delivers. Its 2 L/min flow rate is the fastest among personal portable water filters for emergency situations, and the collapsible flask takes up almost no space in your kit.

    4. MSR Guardian Purifier — Best Portable Water Filter for Emergency Virus Protection

    The MSR Guardian is the only portable water filter for emergency use on this list that also removes viruses without chemicals. This makes it the top choice for urban emergencies where sewage contamination is a concern.

    Key Specifications:

    • Filtration: 0.02 micron hollow fiber (removes viruses, bacteria, and protozoa)
    • Flow rate: 2.5 liters per minute
    • Filter lifespan: 10,000 liters
    • Weight: 17.3 oz
    • Self-cleaning technology — never needs backwashing

    Why it’s worth the investment: In urban flood scenarios, water sources are often contaminated with sewage containing viruses like norovirus and hepatitis A. The MSR Guardian is the only portable water filter for emergency use that provides complete protection against all three pathogen categories without chemical treatment.

    5. Grayl GeoPress 24 oz — Best All-in-One Portable Water Filter for Emergency Use

    The Grayl GeoPress combines filtration and purification in a single press-and-drink bottle. It’s the most convenient portable water filter for emergency situations where simplicity matters.

    Key Specifications:

    • Filtration: Removes viruses, bacteria, protozoa, chemicals, and heavy metals
    • Flow rate: 24 oz in 8 seconds (press mechanism)
    • Filter lifespan: 65 gallons (250 liters) per cartridge
    • Weight: 15.9 oz
    • Built-in bottle — no additional containers needed

    Why it’s ideal for urban emergencies: The Grayl GeoPress is the easiest portable water filter for emergency use — fill, press, drink. It removes everything including chemicals and heavy metals, making it perfect for questionable urban water sources. The trade-off is a shorter filter lifespan, so stock extra cartridges.

    Portable Water Filters for Emergency Use: Comparison Table

    Filter Filtration Level Flow Rate Lifespan Weight Removes Viruses? Price Range
    Sawyer Squeeze 0.1 micron 1.7 L/min 100,000 gal 3 oz No $30-35
    LifeStraw Personal 0.2 micron 0.5 L/min 1,000 gal 2 oz No $15-20
    Katadyn BeFree 0.1 micron 2 L/min 264 gal 2.3 oz No $40-45
    MSR Guardian 0.02 micron 2.5 L/min 2,642 gal 17.3 oz Yes $350-370
    Grayl GeoPress Purifier 24oz/8sec 65 gal 15.9 oz Yes $90-100

    How to Choose the Right Portable Water Filter for Emergency Preparedness

    Selecting the best portable water filter for emergency use depends on your specific situation:

    For Apartment Emergency Kits

    Choose the Sawyer Squeeze as your primary portable water filter for emergency home use, supplemented by a LifeStraw in each family member’s personal kit. The Sawyer’s massive filter lifespan means you’ll have clean water capability for years.

    For Bug-Out Bags

    The Katadyn BeFree or LifeStraw are the best portable water filters for emergency evacuation due to their ultralight weight and compact size. Pair with water purification tablets as a backup method.

    For Urban Flood or Sewage Scenarios

    The MSR Guardian or Grayl GeoPress are essential when virus removal is needed. Urban flooding often mixes sewage with floodwater, making virus-capable portable water filters for emergency use critical.

    Maintaining Your Portable Water Filters for Emergency Readiness

    Owning portable water filters for emergency use isn’t enough — you need to maintain them so they work when disaster strikes:

    1. Test annually — Run water through your filters at least once a year to verify function
    2. Backwash regularly — Sawyer filters need periodic backwashing with the included syringe
    3. Store properly — Keep filters in a cool, dry place. Never store a wet filter in a sealed container (mold risk)
    4. Check expiration dates — Chemical purification tablets and Grayl cartridges have shelf lives
    5. Stock replacement parts — Extra squeeze pouches, cartridges, and O-rings

    Include portable water filters for emergency use in your regular prepper checklist rotation to ensure everything stays in working order.

    Complementing Portable Water Filters with Other Emergency Water Strategies

    Portable water filters for emergency situations work best as part of a comprehensive water security plan. Combine them with:

    • Stored water — Minimum 3-day supply per person (use our water storage calculator)
    • Water purification tablets — Chemical backup for your portable water filters
    • Boiling capability — A camp stove or alternative heat source for the most reliable purification method
    • Water containers — Collapsible water jugs for collection and transport

    For a complete water and food preparedness strategy, read our urban water and food security guide.

    Frequently Asked Questions About Portable Water Filters for Emergency Use

    Do portable water filters for emergency use remove chemicals and heavy metals?

    Most portable water filters for emergency use (like the Sawyer Squeeze and LifeStraw) remove bacteria and protozoa but NOT chemicals or heavy metals. Only the Grayl GeoPress and activated carbon filters remove chemical contaminants. For chemical contamination concerns, pair your filter with activated carbon or choose the Grayl GeoPress.

    How long do portable water filters for emergency preparedness last?

    Filter lifespan varies dramatically. The Sawyer Squeeze lasts up to 100,000 gallons, while the Grayl GeoPress cartridge lasts only 65 gallons. For long-term emergency preparedness, choose filters with longer lifespans and stock replacement cartridges for shorter-lived models.

    Can portable water filters for emergency use purify saltwater?

    No. No portable water filter for emergency use can desalinate saltwater. These filters remove biological contaminants and some chemicals, but they cannot remove dissolved salt. For coastal emergencies, you would need a desalination device or solar still.

    Should I carry multiple portable water filters for emergency situations?

    Yes. The “two is one, one is none” rule applies to portable water filters for emergency preparedness. Carry a primary filter (like the Sawyer Squeeze) and a backup (like the LifeStraw or purification tablets). Redundancy is critical when clean water is a survival necessity.

    How do I store portable water filters for emergency readiness?

    Store portable water filters for emergency use in a cool, dry location away from direct sunlight. If a filter has been used, ensure it’s completely dry before storage to prevent mold growth. Include filters in your emergency kit and check them during regular preparedness reviews.

    Final Verdict: Best Portable Water Filters for Emergency Preparedness

    For most urban preppers, the Sawyer Squeeze SP131 is the best overall portable water filter for emergency preparedness. Its combination of superior filtration, incredible lifespan, lightweight design, and affordable price makes it the clear winner for apartment emergency kits and bug-out bags alike.

    However, the best approach is a layered one: pair a Sawyer Squeeze with LifeStraw backups and water purification tablets for comprehensive emergency water security. Your portable water filters for emergency use are only as good as your overall preparedness plan — so make sure water filtration is part of your complete urban survival strategy.