Author: Modern Urban Prepper Editorial Team

  • Food Storage Rotation (2026): Simple FIFO System for Apartment Preppers

    Food Storage Rotation (2026): Simple FIFO System for Apartment Preppers

    Affiliate Disclosure: To support our research, some links on this site may be affiliate links. If you make a purchase, we may receive a commission at no extra cost to you. We only recommend gear we trust. You can use our free emergency kit tool for a personalized plan.

    Food Storage Rotation: The FIFO Method for Emergency Preppers

    The most common emergency food storage failure isn’t buying the wrong food — it’s letting good food expire on the shelf. Studies show that the average American household wastes 30–40% of its food supply. For preppers with dedicated emergency stockpiles, the waste rate can be even higher because emergency food sits untouched until it’s too late. The solution is systematic rotation using the FIFO method, and it takes less than 10 minutes per month to maintain. For more details, check out our guide on Emergency Food Supply List: 30-Day Stockpile for Small Spaces. You can use our free storage calculator for a personalized plan.

    For the broader preparedness framework, see our complete food and water preparedness guide.

    What Is Food Storage Rotation?

    Food storage rotation is the practice of cycling through your emergency food supply so that the oldest items get consumed first and replaced with fresh purchases. The goal is simple: your emergency stockpile should always contain food that’s within its shelf life and ready to eat at a moment’s notice. Without rotation, you end up with a closet full of expired cans that you discover during the exact emergency when you need them most. For official guidelines, see FEMA.

    Why Rotation Matters — The Hidden Cost of Waste

    Consider this scenario: you spend $200 building a 2-week emergency food supply. Without rotation, roughly 20–30% of that food will expire before you use it — that’s $40–60 wasted. Over 5 years of maintaining an emergency pantry, poor rotation can cost you $200–300 in wasted food. Proper rotation costs you nothing except a few minutes of organization each month.

    Beyond the financial cost, expired food in your emergency supply creates a dangerous false sense of security. You think you have 2 weeks of food, but after removing expired items, you might only have 4–5 days of safe, nutritious food. Rotation isn’t just about saving money — it’s about ensuring your supply actually works when you need it.

    The FIFO Method Step-by-Step

    👉 Build your custom Emergency Kit here

    FIFO food storage rotation system with dated containers
    FIFO food storage rotation system with dated containers

    FIFO stands for First In, First Out. It’s the same inventory management system used by grocery stores, restaurants, and warehouses worldwide. Here’s how to implement it in your home:

    Step 1: Organize Your Current Supply

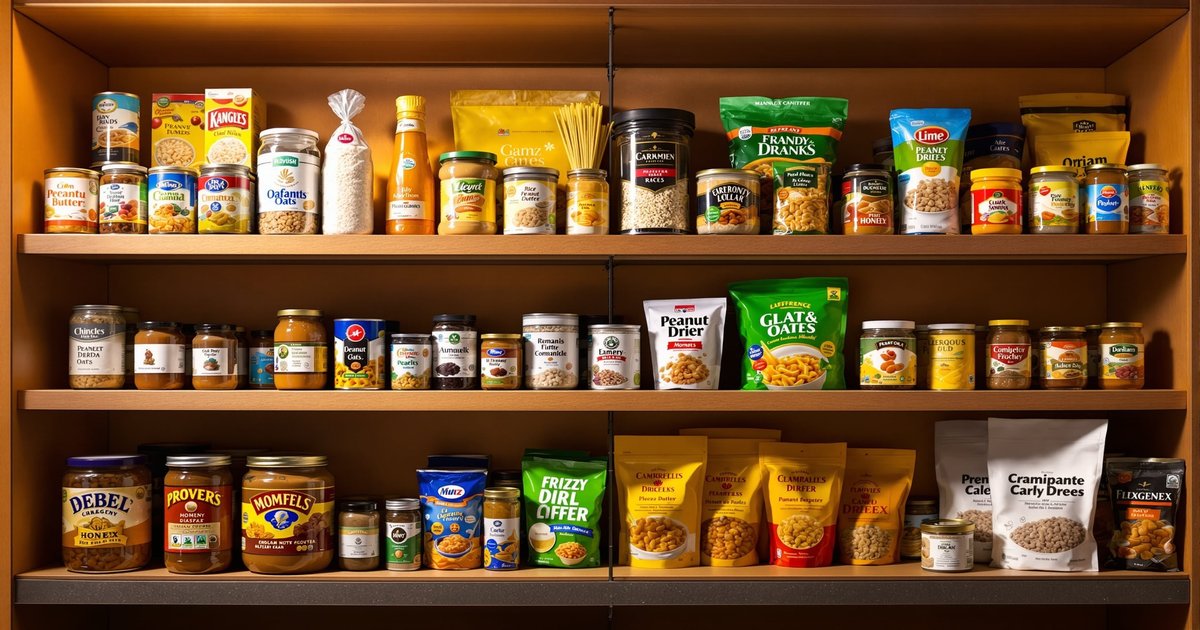
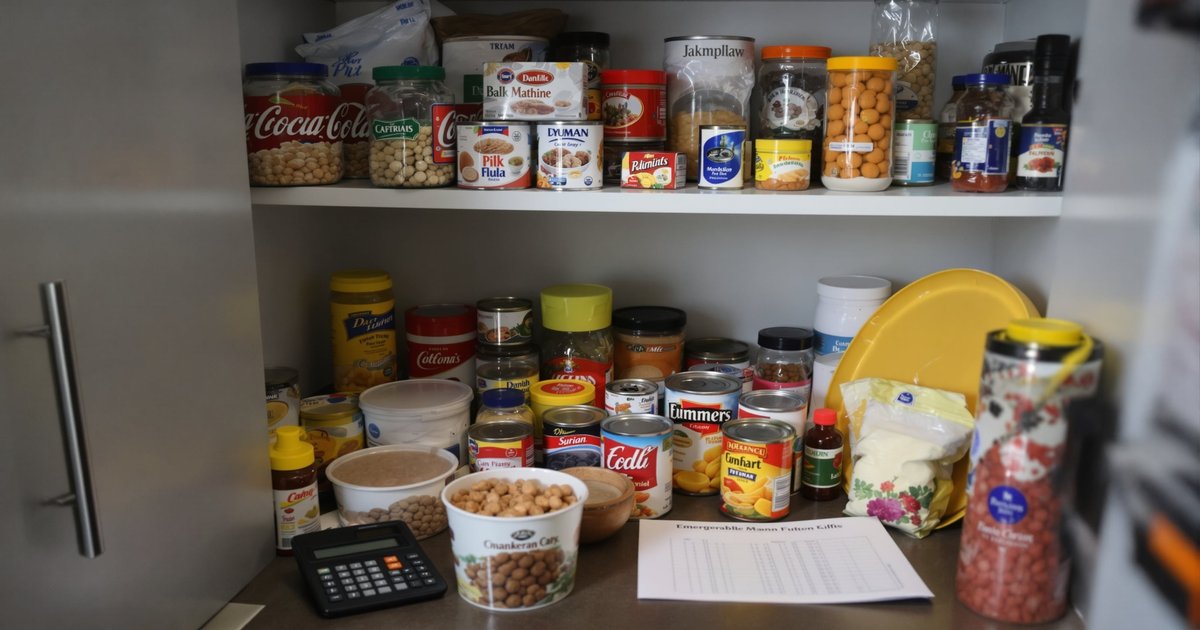
    Pull everything out of your emergency food storage. Group items by category (grains, proteins, canned goods, etc.) and sort each group by expiration date — earliest dates in front, latest dates in back. Discard anything that’s already expired or shows signs of damage (dented cans, broken seals, pest damage). The Ready.gov provides additional emergency preparedness resources.

    Step 2: Label Everything

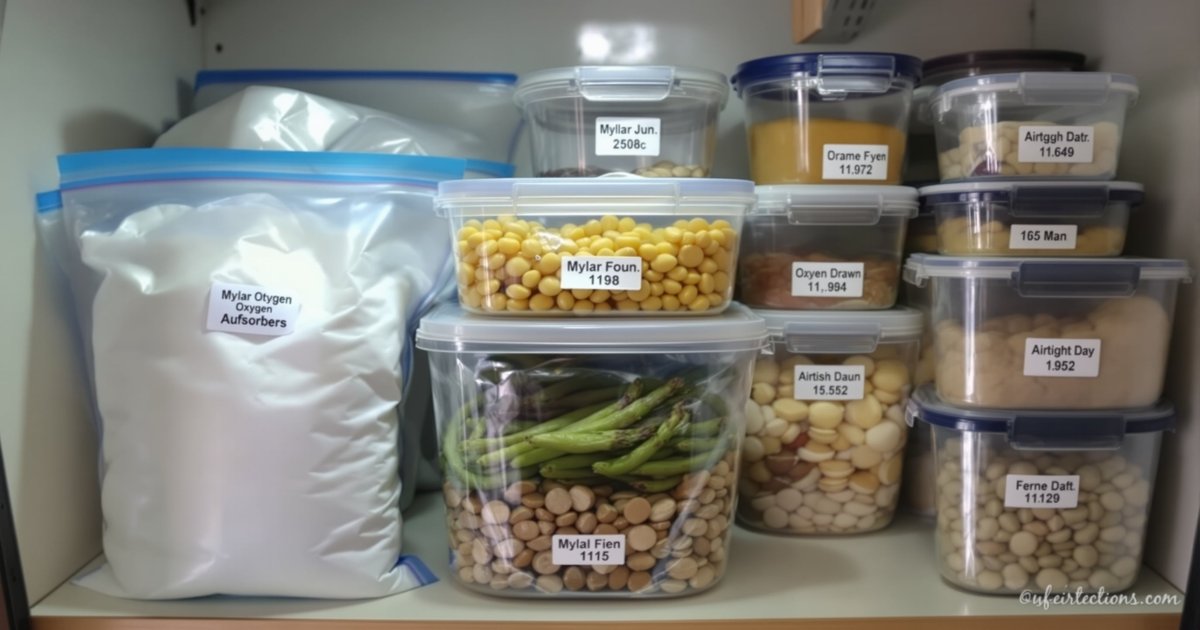
    Use a permanent marker to write the purchase date and expiration date on the front of every item in large, visible text. Many canned goods have expiration dates stamped in tiny print on the bottom — transferring this to the front saves time during rotation checks. For items without printed dates (bulk rice, beans in Mylar bags), write the packaging date and your calculated expiration date.

    Step 3: Set Up Your Storage System

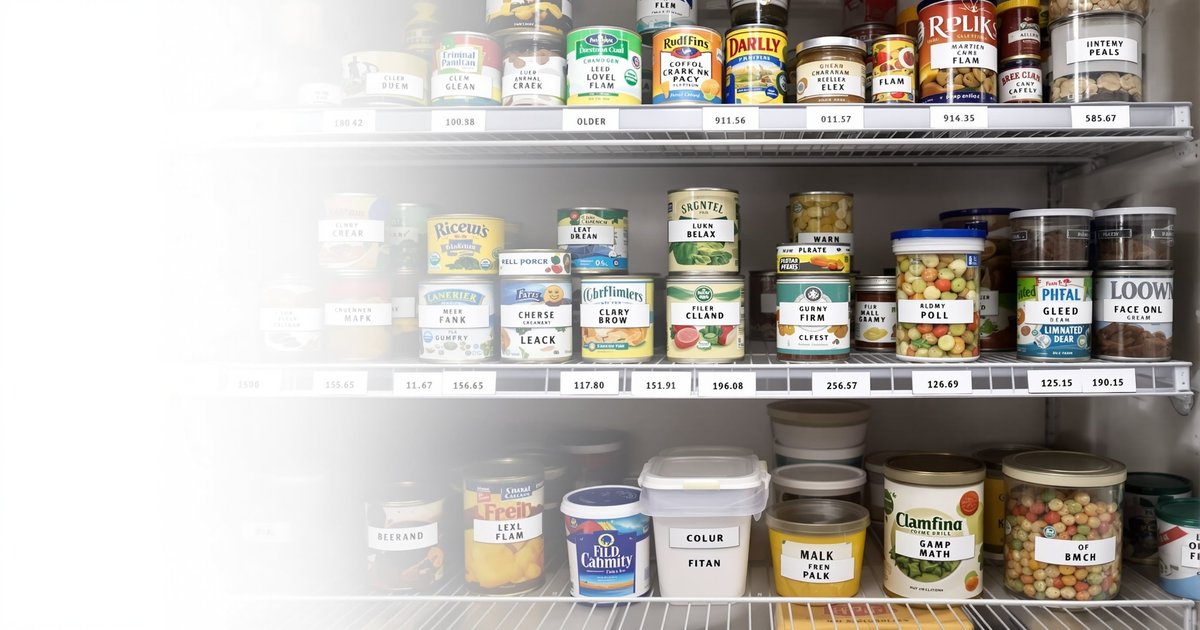
    Arrange your storage so that consuming from the front and restocking from the back is natural and easy:

    • Shelves: Oldest items at the front, newest at the back. When you add new purchases, place them behind existing stock.
    • Can organizers: FIFO can dispensers (like the Shelf Reliance Cansolidator) automatically rotate — you load from the top and dispense from the bottom. These are the single best investment for canned goods rotation.
    • Bins/buckets: For bulk items, label bins with contents and date. When you open a bin, start a new one and move the old one to the “use first” position.

    Step 4: Monthly Rotation Check (10 Minutes)

    Set a monthly calendar reminder to scan your emergency food supply. During each check: You can also explore our prepper planning checklist for more details.

    1. Pull any items expiring within the next 3 months to your regular kitchen pantry for immediate use
    2. Check for damaged packaging, pest signs, or moisture
    3. Update your inventory list (add new purchases, remove consumed items)
    4. Note any categories that need restocking on your next grocery run

    Step 5: Integrate with Regular Shopping

    The most sustainable rotation system treats your emergency supply as an extension of your regular pantry. When you buy canned tuna for dinner, buy two extra cans for your emergency supply. When you pull emergency rice for a regular meal, add it to your shopping list. This “store what you eat, eat what you store” approach makes rotation automatic rather than a separate chore.

    Simple Labeling System That Actually Works

    The best rotation system fails without clear labeling. Here’s the most reliable method for apartment preppers:

    The Sharpie + Masking Tape Method: Use blue painter’s tape (doesn’t leave residue) and a black permanent marker. Write the purchase date on tape and stick it to the front of each item. For items stored in bins, label the bin with “Exp: [month/year range].”

    Color-Coding Option: Use different colored tape for different expiration years:

    • Red tape = Expires 2026
    • Yellow tape = Expires 2027
    • Green tape = Expires 2028

    This visual system lets you spot expiring items at a glance without reading every label.

    Best Storage Containers for Easy Rotation
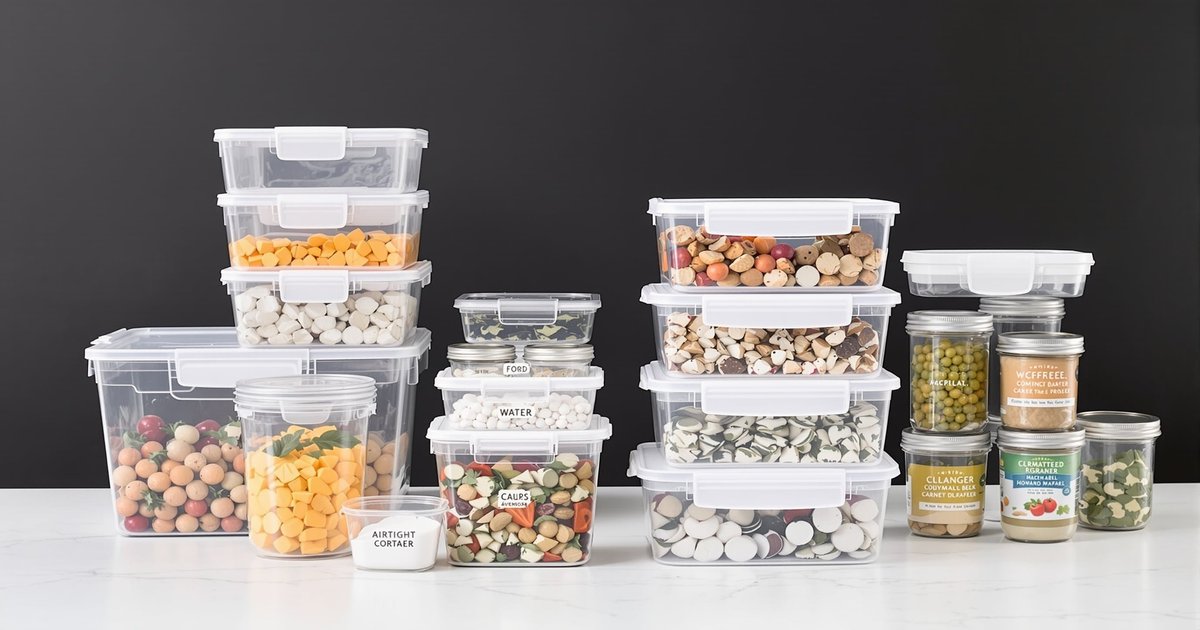
    Best food storage containers for easy rotation system
    Best food storage containers for easy rotation system
    ContainerBest ForFIFO Friendly?Price Range
    FIFO Can OrganizerCanned goods⭐⭐⭐⭐⭐ (automatic)$20–40
    5-Gallon Buckets + Gamma LidsBulk grains, beans⭐⭐⭐ (manual)$8–15 each
    Mylar Bags + O₂ AbsorbersLong-term dry goods⭐⭐ (sealed, no rotation needed)$15 for 50
    Clear Stackable BinsMixed items, visibility⭐⭐⭐⭐ (see contents)$10–20 each
    Wire Shelf RacksCans, jars, boxes⭐⭐⭐⭐ (front access)$25–50

    👉 Calculate exactly how much water you need

    Top recommendation: A FIFO can organizer for your canned goods (the bulk of most emergency supplies) plus 5-gallon buckets with gamma lids for bulk staples. The can organizer alone eliminates 80% of rotation effort for canned goods. You can use our free water calculator for a personalized plan.

    Common Rotation Mistakes Urban Preppers Make

    Common food storage rotation mistakes to avoid
    Common food storage rotation mistakes to avoid

    Mistake 1: “Set It and Forget It” Mentality

    Building an emergency food supply feels like a one-time project, but it’s actually an ongoing system. The most common failure mode is buying a bunch of food, storing it, and never checking it again until an emergency hits — only to find half of it expired. Monthly 10-minute checks prevent this entirely.

    📖 Related reading: Portable Water Filters Emergency: Top 5 Compact Purifiers for Urban Survival For more details, check out our guide on How to Purify Water at Home: 7 DIY Methods That Work in Emergencies.

    Mistake 2: Storing Food You Don’t Normally Eat

    If your family doesn’t eat canned sardines during normal life, they won’t eat them during an emergency either — and those cans will sit until they expire. Stock foods your family already enjoys. Emergency situations are stressful enough without adding unfamiliar, unappetizing food to the mix.

    Mistake 3: No Written Inventory

    Relying on memory leads to duplicate purchases of items you already have plenty of, while other categories run low. A simple spreadsheet or printed list with item, quantity, purchase date, and expiration date takes 15 minutes to create and saves hours of confusion over time.

    Mistake 4: Ignoring Storage Conditions

    Heat is the #1 enemy of stored food. Every 10°F increase in storage temperature roughly halves the shelf life of canned goods. A can of tuna rated for 5 years at 70°F might only last 2–3 years in a garage that hits 90°F in summer. Store food in the coolest, most temperature-stable location in your home — typically an interior closet or under a bed away from exterior walls.

    Shelf Life Quick Reference Chart

    Food CategoryShelf Life (Sealed)Rotation Frequency
    White rice (Mylar + O₂ absorber)25–30 yearsNo rotation needed
    Dried beans (Mylar + O₂ absorber)25–30 yearsNo rotation needed
    Freeze-dried meals25–30 yearsNo rotation needed
    HoneyIndefiniteNo rotation needed
    Salt, sugarIndefiniteNo rotation needed
    Canned meats3–5 yearsEvery 2–3 years
    Canned vegetables/fruits2–5 yearsEvery 1–2 years
    Peanut butter1–2 yearsEvery 6–12 months
    Oats1–2 years (sealed)Every 6–12 months
    Crackers, granola bars6–12 monthsEvery 3–6 months
    Cooking oil1–2 yearsEvery 6–12 months

    Need to build your pantry first? See our emergency food supply list with 47 essential items and budget tiers. Learn more in our complete food & water preparedness guide. And don’t forget the water side of your preparedness — use our water storage calculator to plan your water supply alongside your food rotation system.

    Digital Tools for Tracking Food Storage

    For tech-savvy preppers, digital tracking can simplify inventory management:

    Spreadsheet Method: Create a simple Google Sheet with columns for item name, quantity, purchase date, expiration date, and location. Sort by expiration date to quickly identify what needs rotation.

    Inventory Apps: Apps like “Preppers Pantry” or “Food Storage Tracker” let you scan barcodes and set expiration reminders. Most are free and sync across devices.

    Simple Note Method: Keep a running list in your phone’s notes app. Update it during your monthly inventory check.

    Frequently Asked Questions

    Why should food be rotated during storage?

    Food rotation prevents waste, ensures your emergency supply is always within its shelf life, and maintains nutritional quality. Without rotation, you risk discovering expired food during an emergency when you need it most. Proper FIFO rotation also saves money by ensuring you consume food before it expires.

    What is the best method of stock rotation?

    FIFO (First In, First Out) is the universally recommended stock rotation method. New items go to the back of your storage; you consume from the front. This ensures the oldest items are always used first. FIFO can organizers automate this process for canned goods.

    How often should I rotate my emergency food supply?

    👉 Make sure your supplies fit your space

    Perform a monthly 10-minute check of your emergency food supply. Pull items expiring within 3 months into your regular kitchen for immediate use. Do a comprehensive inventory review quarterly. Items with very long shelf lives (rice in Mylar, freeze-dried meals) don’t need rotation — just periodic condition checks.

  • How to Purify Water at Home (2026): 7 DIY Methods That Work in Emergencies

    How to Purify Water at Home (2026): 7 DIY Methods That Work in Emergencies

    Affiliate Disclosure: To support our research, some links on this site may be affiliate links. If you make a purchase, we may receive a commission at no extra cost to you. We only recommend gear we trust. You can build a custom emergency kit for a personalized plan.

    How to Purify Water at Home: 7 DIY Methods That Actually Work

    When your tap water becomes unsafe — whether from a boil advisory, pipe contamination, or full infrastructure failure — you need to know how to purify water using whatever you have available. These seven methods range from the simplest (boiling) to improvised solutions (charcoal filtration) that you can build from common household materials. Every urban prepper should know at least three of these methods. For more details, check out our guide on Portable Water Filters Emergency: Top 5 Compact Purifiers for Urban Survival. For more details, check out our guide on Urban Water & Food Security: Complete Apartment Preparedness Guide. For more details, check out our guide on Water Purification Tablets: Best Options for Safe Emergency Drinking Water.

    Why Every Urban Prepper Needs DIY Water Purification Skills

    Stored water runs out. Filters break. Tablets expire. The one thing that can’t be taken from you is knowledge. Understanding multiple water purification methods means you’re never truly without safe water — even if all your gear is lost or inaccessible. In urban emergencies, water contamination is often the first crisis: burst mains mix sewage with supply lines, flooding overwhelms treatment plants, and chemical spills can make municipal water dangerous for days or weeks. For official guidelines, see CDC. You can calculate your water needs for a personalized plan. You can plan your food storage setup for a personalized plan.

    The methods below are ordered from most reliable to most improvised. Master the first three, and you’ll handle 95% of urban water emergencies.

    Method 1 — Boiling (Simplest, Most Reliable)

    Boiling water for purification on portable stove during emergency
    Boiling water for purification on portable stove during emergency

    ✅ Build your complete emergency kit:

    👉 https://modernurbanprepper.com/emergency-kit-builder/

    Effectiveness: Kills all bacteria, viruses, and protozoa including Cryptosporidium
    Equipment needed: Heat source + pot
    Time: 1 minute at rolling boil (3 minutes above 6,500 ft elevation)

    Boiling is the gold standard of water purification and the method recommended by the CDC and WHO when other options aren’t available. The process is simple: bring water to a full rolling boil and maintain it for at least 1 minute. At higher elevations, water boils at a lower temperature, so extend to 3 minutes.

    Urban prepper tip: Keep a portable camp stove with at least 4 fuel canisters in your emergency kit. Each 8oz canister provides roughly 60 minutes of boiling time — enough to purify approximately 15–20 liters of water. After boiling, let water cool and pour between two clean containers several times to improve taste by re-aerating it. The Red Cross provides additional emergency preparedness resources.

    Limitations: Requires fuel (finite resource), doesn’t remove chemical contaminants or sediment, and takes time. Not practical for large volumes without significant fuel reserves.

    Method 2 — Water Purification Tablets

    Effectiveness: Kills bacteria, viruses; chlorine dioxide types also kill Cryptosporidium
    Equipment needed: Tablets + container
    Time: 15–30 minutes (4 hours for full Crypto protection with ClO₂)

    The easiest method for urban preppers: drop a tablet in water and wait. No fuel, no equipment, no skill required. Chlorine dioxide tablets (Katadyn Micropur MP1) provide the broadest pathogen coverage. Iodine tablets are cheaper but miss Cryptosporidium. NaDCC tablets (Aquatabs) are the most affordable for bulk stockpiling.

    For detailed product comparisons, shelf life data, and our top picks, see our complete water purification tablets guide.

    Method 3 — Portable Filters

    Effectiveness: Removes bacteria and protozoa; most don’t remove viruses
    Equipment needed: Commercial filter unit
    Time: Immediate (squeeze/pump) to 15 minutes (gravity)

    Portable water filters like the Sawyer Mini, LifeStraw, and Katadyn BeFree use hollow-fiber membrane technology to physically remove pathogens. The Sawyer Mini filters down to 0.1 microns — small enough to catch bacteria and protozoa but not viruses (which are 0.02–0.3 microns). For urban water sources where viral contamination is possible (sewage overflow), pair a filter with purification tablets for complete protection.

    For detailed reviews and comparisons, see our portable water filter reviews.

    Method 4 — UV Treatment (SteriPEN)

    Effectiveness: Neutralizes bacteria, viruses, and protozoa
    Equipment needed: UV purification device + batteries/USB power
    Time: 60–90 seconds per liter

    UV purification works by scrambling the DNA of pathogens, preventing them from reproducing. The SteriPEN Ultra is the most popular consumer device — it treats 1 liter in 90 seconds and runs on a rechargeable battery (USB charging). UV treatment is fast, leaves no chemical taste, and is effective against the full spectrum of biological contaminants.

    Critical limitations: UV doesn’t work on cloudy or turbid water — particles shield pathogens from the UV light. Always pre-filter turbid water through a cloth or coffee filter before UV treatment. UV also provides no residual protection — treated water can be recontaminated. And the device requires power, making it dependent on batteries or solar charging. For a deeper dive, see our guide on emergency preparedness checklist.

    Method 5 — Charcoal Filtration (DIY Build)

    DIY charcoal water filtration system with visible filter layers
    DIY charcoal water filtration system with visible filter layers

    Effectiveness: Removes sediment, some chemicals, improves taste; limited pathogen removal
    Equipment needed: Activated charcoal, sand, gravel, container
    Time: 15–30 minutes per batch

    A DIY charcoal filter is one of the most useful improvised purification methods. Activated charcoal adsorbs chemicals, chlorine, and some organic compounds while the sand and gravel layers remove sediment. Here’s how to build one:

    ✅ Calculate exactly how much water you need:

    👉 https://modernurbanprepper.com/water-storage-calculator/

    DIY Charcoal Filter — Step by Step

    1. Get a container: A 2-liter plastic bottle with the bottom cut off works perfectly. A 5-gallon bucket with a hole drilled in the bottom works for larger volumes.
    2. Layer 1 (bottom): Place a coffee filter or clean cloth at the spout/hole to prevent material from falling through.
    3. Layer 2: Add 2–3 inches of clean gravel (small pebbles).
    4. Layer 3: Add 2–3 inches of coarse sand.
    5. Layer 4: Add 3–4 inches of activated charcoal (crush charcoal briquettes if you don’t have activated charcoal — but avoid briquettes with lighter fluid additives).
    6. Layer 5: Add 2–3 inches of fine sand.
    7. Layer 6 (top): Add 1–2 inches of gravel to prevent the sand from disturbing when you pour water in.
    8. Flush the filter: Pour several liters of clean water through before using to wash out charcoal dust.

    Important: A charcoal filter improves water quality and removes many contaminants, but it does NOT reliably kill bacteria or viruses. Always follow charcoal filtration with boiling or chemical treatment (tablets) for safe drinking water. Think of it as a pre-filter that makes other purification methods more effective.

    Method 6 — Solar Disinfection (SODIS)

    Effectiveness: Kills most bacteria and viruses; limited against Cryptosporidium
    Equipment needed: Clear plastic or glass bottles + sunlight
    Time: 6 hours in direct sunlight (2 days if cloudy)

    SODIS is a WHO-recognized water treatment method used in developing countries where other purification isn’t available. Fill clear PET plastic bottles (standard water bottles) with water, lay them on a reflective surface (like a car hood or aluminum foil) in direct sunlight for at least 6 hours. The combination of UV radiation and heat kills most pathogens.

    Best practices: Use bottles no larger than 2 liters (UV penetration decreases with depth). Pre-filter turbid water — SODIS works best on clear water. Place bottles on a corrugated metal roof or reflective surface to increase UV exposure. In cloudy conditions, extend treatment to 2 full days.

    Limitations: Slow, weather-dependent, doesn’t work on cloudy/turbid water, limited effectiveness against Cryptosporidium, and requires direct sunlight. This is a last-resort method for urban preppers, but it’s free and requires no equipment beyond bottles you probably already have.

    Method 7 — Two-Stage DIY Filter Build

    Effectiveness: Removes sediment, many chemicals, and significantly reduces biological contaminants
    Equipment needed: Two 5-gallon buckets, charcoal, sand, gravel, cloth
    Time: 30–60 minutes per batch

    This is the upgraded version of Method 5, designed for family-scale water processing. Stack two 5-gallon buckets: the top bucket contains the filter media (gravel → sand → charcoal → sand → gravel), and the bottom bucket collects filtered water through a spigot. The two-stage design allows you to run water through the filter twice for improved clarity and contaminant removal.

    For the best results, combine this filter with boiling or tablet treatment: filter first to remove sediment and chemicals, then boil or add tablets to kill remaining pathogens. This two-step process (physical filtration + chemical/heat disinfection) is how professional water treatment works — you’re just doing it at a smaller scale.

    Which Method Is Best for Apartments?

    Apartment-friendly water purification methods on kitchen counter
    Apartment-friendly water purification methods on kitchen counter
    Method Space Needed Cost Skill Level Reliability Best For
    Boiling Minimal (stove + pot) $25–50 (camp stove) Beginner ⭐⭐⭐⭐⭐ Primary method
    Tablets Pocket-sized $0.08–0.70/L Beginner ⭐⭐⭐⭐⭐ Bug-out bag, backup
    Portable Filter Minimal $20–90 Beginner ⭐⭐⭐⭐ Daily use, groups
    UV (SteriPEN) Minimal $50–100 Beginner ⭐⭐⭐⭐ Speed, no taste change
    Charcoal Filter Moderate $5–15 DIY Intermediate ⭐⭐⭐ Pre-filtration
    SODIS Balcony/roof access Free Beginner ⭐⭐ Last resort
    Two-Stage Filter Moderate $15–30 DIY Intermediate ⭐⭐⭐ Family-scale processing

    Our apartment recommendation: Keep a portable filter (Sawyer Mini) as your primary method, water purification tablets as your backup, and a camp stove for boiling as your failsafe. These three methods together cover every scenario and fit in a single drawer. Use our water storage calculator to determine how much stored water you need alongside your purification capability.

    Frequently Asked Questions

    Can you purify water with bleach?

    Yes — regular unscented household bleach (5.25–8.25% sodium hypochlorite) can purify water in emergencies. Add 8 drops (1/8 teaspoon) per gallon of clear water, stir, and wait 30 minutes. The water should have a slight chlorine smell after treatment. If it doesn’t, repeat the dose and wait another 15 minutes. This is essentially the same chemistry as NaDCC tablets.

    Does boiling water remove chemicals?

    No. Boiling kills biological contaminants but does not remove chemicals, heavy metals, or microplastics. For chemical contamination, you need activated carbon filtration (Method 5 above) or a commercial filter with an activated carbon element. In cases of known chemical contamination, do not rely on boiling alone.

    How long does purified water stay safe?

    Water purified by boiling or UV treatment has no residual protection and should be consumed within 24 hours or stored in a sealed, clean container. Water treated with chlorine-based tablets or bleach maintains residual protection for 24–48 hours. For long-term storage, use sealed containers and re-treat before drinking if stored more than 48 hours.

    ✅ Make sure your supplies fit your space:

    👉 https://modernurbanprepper.com/prepper-storage-calculator/

    Back to the full urban water & food security guide for the complete picture of emergency water and food preparedness. For more on water storage planning, see our emergency water storage guide.

  • Emergency Food Supply List (2026): 30-Day Stockpile for Small Spaces

    Emergency Food Supply List (2026): 30-Day Stockpile for Small Spaces

    Affiliate Disclosure: To support our research, some links on this site may be affiliate links. If you make a purchase, we may receive a commission at no extra cost to you. We only recommend gear we trust. You can use our kit builder to get started for a personalized plan.

    Emergency Food Supply List: Printable Checklist for Urban Preppers [2026]

    Building an emergency food supply doesn’t have to be overwhelming or expensive. This list gives you exactly what to buy, how much, and in what order — organized by food category with shelf life data, calorie counts, and budget tiers from $50 to $250. Whether you’re building a 72-hour kit or a 90-day pantry, use this checklist to build your supply systematically. For more details, check out our guide on Food Storage Rotation: Simple FIFO System for Apartment Preppers. You can calculate your storage requirements for a personalized plan.

    How Much Emergency Food Do You Need?

    The standard planning figure is 2,000 calories per person per day for adults. Children need 1,200–1,800 depending on age. Active adults or those in cold environments should plan for 2,500+. Here’s what that looks like across different timeframes:

    Duration1 Person (cal)Family of 4 (cal)Budget Range
    72 hours6,00024,000$15–50
    2 weeks28,000112,000$75–200
    30 days60,000240,000$150–400
    90 days180,000720,000$400–1,000

    Start with 72 hours and build up. Don’t try to jump straight to 90 days — you’ll overspend and end up with food you don’t know how to rotate. Pair your food supply with adequate water storage using our water storage calculator. For more details, check out our guide on Portable Water Filters Emergency: Top 5 Compact Purifiers for Urban Survival. You may also find How to Purify Water at Home: 7 DIY Methods That Work in Emergencies helpful.

    👉 Build your custom Emergency Kit here

    The 47-Item Emergency Food Supply List

    Comprehensive emergency food supply items on organized shelves
    Comprehensive emergency food supply items on organized shelves

    This list is organized by food category. Items marked with ⭐ are highest priority — buy these first for your 72-hour kit. Items marked with 📦 are best for long-term (90-day) storage.

    Grains & Starches (The Calorie Foundation)

    #ItemQty (2-week/person)Calories/servingShelf LifePriority
    1White rice10 lbs205/cup cooked25–30 years (Mylar)⭐📦
    2Rolled oats5 lbs150/half cup dry1–2 years (sealed)
    3Pasta (various)5 lbs200/cup cooked2–3 years
    4Flour (all-purpose)5 lbs455/cup1 year (sealed)
    5Cornmeal2 lbs440/cup1–2 years
    6Crackers (saltines/pilot bread)4 boxes70/5 crackers6–12 months
    7Instant mashed potatoes2 boxes110/serving1–2 years
    8Granola bars24 bars150–200/bar6–12 months

    Proteins

    #ItemQty (2-week/person)Calories/servingShelf LifePriority
    9Canned tuna6 cans100/can3–5 years
    10Canned chicken4 cans130/can3–5 years
    11Canned salmon3 cans180/can3–5 years
    12Spam/canned meat3 cans180/serving3–5 years
    13Dried beans (pinto/black)5 lbs245/cup cooked25–30 years (Mylar)⭐📦
    14Dried lentils3 lbs230/cup cooked25–30 years (Mylar)📦
    15Peanut butter2 jars (40oz)190/2 tbsp1–2 years
    16Canned chili/stew4 cans250/can2–5 years
    17Beef jerky1 lb80/oz1–2 years
    18Protein powder1 container120/scoop1–2 years

    Fruits & Vegetables

    #ItemQty (2-week/person)Calories/servingShelf LifePriority
    19Canned vegetables (mixed)8 cans60–80/can2–5 years
    20Canned tomatoes4 cans40/can2–5 years
    21Canned fruit (in juice)6 cans100/can2–5 years
    22Dried fruit (raisins, apricots)2 lbs130/quarter cup6–12 months
    23Applesauce cups12 cups90/cup1–2 years
    24Freeze-dried vegetables2 cansvaries25 years📦
    25Canned beans (baked/kidney)4 cans200/can2–5 years
    26Tomato sauce/paste4 cans30–70/serving2–5 years

    Fats, Oils & Calorie Boosters

    #ItemQty (2-week/person)Calories/servingShelf LifePriority
    27Cooking oil (vegetable/olive)1 bottle (48oz)120/tbsp1–2 years
    28Honey1 jar (32oz)60/tbspIndefinite📦
    29Sugar (white)5 lbs45/tbspIndefinite (sealed)📦
    30Powdered milk1 box80/cup prepared2–10 years (sealed)
    31Nuts (mixed/almonds)2 lbs170/oz6–12 months
    32Seeds (sunflower/pumpkin)1 lb160/oz6–12 months

    Comfort Foods & Morale Boosters

    #ItemQty (2-week/person)Calories/servingShelf LifePriority
    33Coffee/tea1 canister + 1 box2–5/cup1–2 years
    34Hot chocolate mix1 box120/packet1–2 years
    35Hard candy1 bag60/5 pieces1–2 years
    36Chocolate bars6 bars200–250/bar6–12 months
    37Instant soup packets12 packets60–100/packet1–2 years
    38Mac and cheese boxes4 boxes250/serving1–2 years

    Seasonings & Essentials

    #ItemQtyShelf LifePriority
    39Salt2 lbsIndefinite⭐📦
    40Black pepper1 container3–4 years
    41Garlic powder1 container3–4 years
    42Bouillon cubes/powder1 jar1–2 years
    43Soy sauce1 bottle2–3 years
    44Hot sauce1 bottle3–5 years
    45Vinegar1 bottleIndefinite📦
    46Baking soda1 boxIndefinite (sealed)
    47Multivitamins1 bottle (90-day)N/A

    👉 Calculate exactly how much water you need

    Budget Emergency Food Pantry — $100 for 2 Weeks

    Budget two-week emergency food pantry for apartment living
    Budget two-week emergency food pantry for apartment living

    If you’re starting from zero and want a functional 2-week emergency food supply for one adult, here’s your shopping list prioritized by caloric value per dollar:

    ItemQtyCostTotal Calories
    White rice (25 lb bag)1$15~40,000
    Dried pinto beans (10 lbs)1$12~15,000
    Rolled oats (10 lbs)1$8~17,000
    Peanut butter (40oz jars)2$12~9,400
    Canned vegetables (15oz)12$12~2,400
    Canned tuna/chicken8$12~1,600
    Pasta (1 lb boxes)5$6~8,400
    Cooking oil (48oz)1$5~11,500
    Sugar (5 lbs)1$4~8,700
    Salt, bouillon, spices$5minimal
    Coffee/tea1$5minimal
    Multivitamins1$4N/A
    TOTAL$100~114,000

    That’s approximately 114,000 calories — enough for one adult for 57 days at 2,000 calories/day, or a family of four for 2 weeks. The key is calorie-dense staples (rice, beans, oats, oil) supplemented by canned goods for nutrition and variety. For a deeper dive, see our guide on preparedness checklist.

    Best Freeze-Dried Emergency Food Brands

    For longer shelf life (25+ years) and easier preparation (just add water), freeze-dried meals are the premium option. Here are the top brands for urban preppers: You can figure out exactly how much water your household needs for a personalized plan.

    BrandShelf LifePrice/ServingTaste RatingBest For
    Mountain House30 years$5–8⭐⭐⭐⭐⭐Best taste, proven reliability
    Augason Farms25 years$2–4⭐⭐⭐⭐Best value, bulk ingredients
    Wise Company25 years$3–5⭐⭐⭐Budget complete meal kits
    ReadyWise25 years$3–5⭐⭐⭐⭐Variety packs, good portions
    My Patriot Supply25 years$3–6⭐⭐⭐⭐Complete kits with water filtration

    Our recommendation: Start with grocery store staples (the $100 plan above) for your first 2-week supply. Then add Mountain House or Augason Farms freeze-dried meals for variety and extended shelf life. Don’t build your entire supply from freeze-dried meals — it’s too expensive and you’ll miss the nutritional variety of a mixed pantry.

    How to Calculate Your 30-Day Food Needs

    Before building your emergency food supply, you need to understand how much food your household actually needs. The average adult requires 2,000-2,500 calories per day to maintain normal activity levels. During emergencies, stress and physical activity may increase this requirement.

    Here’s a simple calculation method:

    • Adults: 2,000 calories/day × 30 days = 60,000 calories per person
    • Children (ages 4-13): 1,500 calories/day × 30 days = 45,000 calories
    • Teenagers: 2,500 calories/day × 30 days = 75,000 calories

    For a family of four (2 adults, 2 children), you’ll need approximately 210,000 total calories for 30 days. When shopping, check nutrition labels to calculate how many servings you’ll need. A can of beans (350 calories) provides roughly one meal component for one person.

    According to the CDC’s emergency preparedness guidelines, it’s wise to add a 10% buffer to account for higher stress and activity levels during emergencies.

    Best Storage Methods for Small Spaces

    Urban preppers face unique storage challenges. Space is premium, and proper food preservation is critical to avoid waste.

    Mylar Bags with Oxygen Absorbers: The gold standard for long-term storage (20+ years). These metallized bags protect food from light, moisture, and oxygen. They’re stackable and fit perfectly in closets, under beds, or in storage ottomans. Use 1-gallon bags for rice, beans, and pasta.

    Food-Grade Plastic Buckets: Excellent for bulk storage. Stack them in closets or use as end tables with a cushion on top. A 5-gallon bucket holds approximately 35 pounds of wheat or 33 pounds of white rice.

    Clear Storage Bins: Ideal for canned goods and rotation systems. Label each bin by expiration date range (e.g., “Expires 2026 Q1”). Store under beds, in coat closets, or on top of kitchen cabinets.

    Vacuum-Sealed Bags: Perfect for dehydrated foods and save 50% space compared to original packaging.

    Food Storage Tips for Apartment Preppers

    Food storage containers and organization tips for apartments
    Food storage containers and organization tips for apartments

    👉 Make sure your supplies fit your space

    • Label everything with purchase date and expiration date using a permanent marker
    • Use the FIFO method — new items go to the back, consume from the front. Read our complete food storage rotation guide for implementation steps
    • Store in cool, dark locations — avoid garages, attics, or areas near heat sources
    • Invest in proper containers — 5-gallon food-grade buckets with gamma lids for bulk grains and beans
    • Rotate quarterly — check dates every 3 months and incorporate near-expiry items into regular meals
    • Keep a written inventory — a simple spreadsheet or printed list prevents duplicate purchases and missed expirations
  • Urban Water & Food Security (2026): Complete Apartment Preparedness Guide

    Urban Water & Food Security (2026): Complete Apartment Preparedness Guide

    Urban water and food security is the foundation of apartment preparedness in 2026. When infrastructure fails — whether from natural disasters, supply chain disruptions, or utility outages — your ability to feed and hydrate your household depends entirely on the urban water and food security measures you’ve put in place beforehand.

    This complete guide covers every aspect of urban water and food security for city dwellers, from calculating your exact needs to building efficient storage systems that work in small apartment spaces. Follow this guide to build a resilient urban water and food security plan that keeps your family sustained through any emergency.

    Understanding Urban Water and Food Security Threats

    Urban water and food security faces unique threats in metropolitan environments:

    • Municipal water system failures — Pipe breaks, contamination events, or pump station power outages can cut water supply instantly
    • Supply chain disruptions — Grocery stores carry only 3 days of inventory; panic buying empties shelves in hours
    • Power grid failures — Extended outages spoil refrigerated and frozen food, disable water pumps in high-rise buildings
    • Natural disasters — Earthquakes, floods, and severe storms can simultaneously disrupt both water and food supply
    • Boil water advisories — Contamination events that make tap water unsafe without treatment

    Building robust urban water and food security means preparing for all of these scenarios simultaneously.

    Urban Water Security: Your #1 Priority

    Water is the most critical component of urban water and food security. You can survive weeks without food but only 3 days without water. In an apartment setting, water security requires careful planning due to space constraints.

    How Much Water Do You Need?

    The standard recommendation for urban water and food security is 1 gallon per person per day — half for drinking and half for cooking and hygiene. Use our emergency water storage calculator to determine your household’s exact requirements.

    For a family of two, a 14-day urban water and food security water supply requires 28 gallons — roughly four 7-gallon containers or fourteen 2-liter bottles plus additional gallon jugs.

    Water Storage Solutions for Apartments

    Effective urban water and food security water storage for small spaces includes:

    1. Stackable water containers (5-7 gallon) — Store under beds, in closets, or along walls. BPA-free containers with spigots are most practical.
    2. WaterBOB bathtub bladder — Fills your bathtub with 100 gallons of fresh water when you know an emergency is coming. Essential for urban water and food security.
    3. Commercial water bottles — Cases of bottled water store easily and have long shelf lives.
    4. Collapsible water containers — Store flat when empty, expand when needed for water collection.

    Water Purification Methods

    Storage alone isn’t sufficient for complete urban water and food security. You need multiple purification methods:

    Urban Food Security: Building Your Stockpile

    The food component of urban water and food security requires strategic selection of items that maximize nutrition, shelf life, and space efficiency.

    Calculating Your Food Needs

    Use our emergency food supply calculator to determine exactly how much food your household needs. For urban water and food security, plan for a minimum of 2,000 calories per person per day, with a target stockpile of 14-30 days.

    Best Foods for Urban Water and Food Security

    Choose foods that meet these criteria: long shelf life, high calorie density, minimal water needed for preparation, and compact storage. Our emergency food supply list provides a complete 30-day stockpile plan, but here are the top categories:

    Tier 1: No-Cook, No-Water Foods (Highest Priority)

    • Canned meats (tuna, chicken, spam) — 2-5 year shelf life
    • Canned fruits and vegetables — 2-5 year shelf life
    • Peanut butter — 1-2 year shelf life, high calorie density
    • Crackers and hardtack — 6-12 month shelf life
    • Trail mix and nuts — 6-12 month shelf life
    • Energy bars and protein bars — 12-18 month shelf life
    • Dried fruit — 6-12 month shelf life

    Tier 2: Minimal Water/Cooking Required

    • Instant oatmeal — just add hot water
    • Ramen noodles — quick cooking, long shelf life
    • Instant rice — 5-minute preparation
    • Powdered milk — add water for nutrition
    • Instant coffee and tea — morale boosters

    Tier 3: Longer Preparation but Extended Shelf Life

    • Dried beans and lentils — 25+ year shelf life when properly stored
    • White rice — 25+ year shelf life in sealed containers
    • Freeze-dried meals — 25+ year shelf life, just add water
    • Pasta — 2-3 year shelf life

    Food Storage in Small Apartments

    Urban water and food security in apartments requires creative storage solutions. Use our prepper storage calculator to ensure your supplies fit your available space.

    Smart storage locations include:

    • Under beds — the most underutilized storage space in most apartments
    • Closet floors and top shelves
    • Behind furniture along walls
    • Inside ottomans and storage furniture
    • On top of kitchen cabinets
    • In a dedicated “prepper closet” or section of a closet

    Food Rotation: The FIFO System

    Maintaining urban water and food security requires regular rotation to prevent waste. Implement the FIFO (First In, First Out) food storage rotation system to ensure nothing expires unused. Key principles:

    1. Date everything when purchased
    2. Place new items behind older items
    3. Integrate stockpile items into regular meals
    4. Check expiration dates monthly
    5. Replace consumed items promptly

    Cooking Without Utilities

    Complete urban water and food security includes the ability to prepare food when gas and electricity are unavailable:

    • Butane camp stove — Compact, affordable, and effective for apartment use (with ventilation)
    • Sterno fuel cans — Safe for indoor use, ideal for heating canned food
    • Solar oven — Works on balconies with direct sunlight
    • Portable power station — Can power a small electric hot plate or microwave
    • Rocket stove — For outdoor use only, extremely fuel-efficient

    Urban Water and Food Security for Special Dietary Needs

    Your urban water and food security plan must account for dietary restrictions and special needs:

    • Infants — Stock formula, baby food, and purified water for preparation
    • Allergies — Ensure all stockpiled foods are safe for household members with allergies
    • Medications — Some medications require food; plan accordingly
    • Diabetics — Balance carbohydrate-heavy emergency foods with protein and fat sources
    • Pets — Include pet food and water in your urban water and food security calculations

    Building Your Urban Water and Food Security Plan: Step by Step

    1. Week 1 — Calculate your water and food needs using our calculators. Purchase 3 days of water storage and no-cook food items.
    2. Week 2 — Expand to 7 days of water and food. Purchase a portable water filter.
    3. Week 3 — Reach 14 days of supplies. Add water purification tablets and a cooking alternative.
    4. Week 4 — Implement your FIFO rotation system. Organize storage locations.
    5. Month 2 — Expand to 30 days of food. Add redundant water purification methods.
    6. Month 3 — Fine-tune your system. Practice cooking with emergency methods. Test water filters.

    Frequently Asked Questions About Urban Water and Food Security

    How much does a basic urban water and food security setup cost?

    A 14-day urban water and food security setup for two people costs approximately $150-250. This includes water storage containers ($30-50), a portable water filter ($30-35), purification tablets ($10-15), and a two-week food stockpile ($80-150). Expanding to 30 days adds another $100-200.

    How do I store water in a small apartment for urban water and food security?

    The most space-efficient approach to urban water and food security water storage uses stackable 5-7 gallon containers stored under beds and in closets. A WaterBOB bathtub bladder provides 100 gallons of emergency storage using space you already have. Supplement with cases of commercial bottled water stored along walls or under furniture.

    What foods last the longest for urban water and food security?

    For maximum shelf life in your urban water and food security stockpile, prioritize: white rice and dried beans (25+ years when sealed), freeze-dried meals (25+ years), honey (indefinite), salt and sugar (indefinite), and canned goods (2-5 years). These items form the backbone of long-term urban water and food security.

    Can I rely on grocery delivery during an emergency?

    No. Urban water and food security cannot depend on grocery delivery or store availability during emergencies. Supply chains fail within hours of major events, and delivery services cease operating. Your urban water and food security must be self-contained and pre-positioned in your home.

    Taking Action on Urban Water and Food Security

    Urban water and food security is the most fundamental aspect of apartment preparedness. Without reliable access to clean water and adequate nutrition, no other survival strategy matters. Start building your urban water and food security today using the step-by-step plan above, and track your progress with our urban prepper checklist.

    For the complete picture of urban preparedness, combine your urban water and food security plan with city home defense, an apartment emergency kit, and the strategies in our comprehensive urban survival guide.

  • Water Purification Tablets (2026): Best Options for Safe Emergency Drinking Water

    Water Purification Tablets (2026): Best Options for Safe Emergency Drinking Water

    Affiliate Disclosure: To support our research, some links on this site may be affiliate links. If you make a purchase, we may receive a commission at no extra cost to you. We only recommend gear we trust. You can build a custom emergency kit for a personalized plan.

    Water Purification Tablets: Which Actually Work? [2026 Testing Guide]

    When your city’s water supply fails — whether from a burst main, contamination event, or natural disaster — water purification tablets are the fastest, lightest, and most affordable way to make water safe to drink. But not all tablets are created equal. Some kill bacteria but miss viruses. Others taste terrible. And that expired pack in your emergency kit? It might still work — or it might not. For more details, check out our guide on Portable Water Filters Emergency: Top 5 Compact Purifiers for Urban Survival. You may also find How to Purify Water at Home: 7 DIY Methods That Work in Emergencies helpful. See also our Urban Water & Food Security: Complete Apartment Preparedness Guide.

    This guide breaks down the three main types of water purification tablets, compares the top 6 products side by side, and answers the questions urban preppers actually ask — including whether expired tablets are still safe to use. You can calculate your water needs for a personalized plan. You can plan your food storage setup for a personalized plan.

    Types of Water Purification Tablets

    Water purification tablets fall into three chemical categories, each with distinct advantages and trade-offs. Understanding these differences is critical for choosing the right tablet for your emergency kit.

    Iodine-Based Tablets

    👉 Build your custom Emergency Kit here

    Iodine tablets (like Potable Aqua) have been the military standard for decades. They’re cheap, widely available, and effective against most bacteria and viruses. However, iodine leaves a noticeable chemical taste, doesn’t kill Cryptosporidium, and isn’t recommended for pregnant women, people with thyroid conditions, or long-term use beyond 3 weeks. Treatment time is 30 minutes for clear water, longer for cold or turbid water. The EPA provides additional drinking water safety standards and guidelines.

    Chlorine Dioxide Tablets

    Chlorine dioxide (ClO₂) tablets like Katadyn Micropur MP1 and Aquamira represent the gold standard for emergency water purification. They kill bacteria, viruses, and Cryptosporidium — the one pathogen iodine misses. The taste is significantly better than iodine, closer to municipal tap water. The trade-off is treatment time: 15 minutes for bacteria/viruses, but a full 4 hours for Cryptosporidium effectiveness. They also cost 2–3x more per tablet than iodine.

    Sodium Hypochlorite (NaDCC) Tablets

    NaDCC tablets like Aquatabs are the WHO-recommended standard for humanitarian disaster relief. They dissolve fast (under 30 minutes), are extremely affordable in bulk, and are effective against bacteria and viruses. Like iodine, they don’t reliably kill Cryptosporidium. Aquatabs are the most widely used water purification tablet globally — over 1 billion tablets distributed annually in disaster zones.

    Top 6 Water Purification Tablets — Comparison Table

    Water purification tablet brands compared side by side
    Water purification tablet brands compared side by side
    ProductActive IngredientTreats (L/tablet)Treatment TimeKills Crypto?Shelf LifePrice (per tablet)
    Katadyn Micropur MP1Chlorine Dioxide1L15 min (4hr for Crypto)✅ Yes5 years~$0.70
    Potable AquaIodine1L30 minutes❌ No4 years (unopened)~$0.20
    Potable Aqua Chlorine DioxideChlorine Dioxide1L30 min (4hr for Crypto)✅ Yes4 years~$0.60
    AquatabsNaDCC1L (49mg) / 20L (167mg)30 minutes❌ No5 years~$0.08
    Aquamira Water PurifierChlorine Dioxide1L15 min (4hr for Crypto)✅ Yes5 years~$0.50
    Coleman Water PurificationIodine1L30 minutes❌ No4 years~$0.15

    Our pick for most urban preppers: Katadyn Micropur MP1 for your primary kit (Cryptosporidium protection matters in urban water sources), plus a bulk pack of Aquatabs as your budget backup supply. This two-tablet strategy gives you both quality and quantity.

    In-Depth Reviews

    Katadyn Micropur MP1 — Best Overall

    The Micropur MP1 is the tablet we recommend for primary emergency kits. Each individually sealed tablet treats 1 liter and remains effective for 5 years in storage. The chlorine dioxide formula handles the full spectrum of waterborne pathogens including Cryptosporidium, which is particularly relevant for urban water sources that may be contaminated by sewage overflow during disasters. The individual foil packaging means you can toss a strip of 30 into a bug-out bag without worrying about moisture degradation. At roughly $0.70 per tablet, it’s the most expensive option — but when you’re purifying questionable urban water, this isn’t where you cut corners.

    Aquatabs — Best Budget Option

    At $0.08 per tablet, Aquatabs are the most cost-effective way to build a deep water purification stockpile. The 49mg tablets treat 1 liter each, while the larger 167mg tablets handle 20 liters — ideal for family-scale purification. These are the same tablets used by UNICEF, the Red Cross, and WHO in disaster relief operations worldwide. The NaDCC formula dissolves quickly and leaves minimal taste. The limitation is no Cryptosporidium protection, so pair these with a portable filter for comprehensive coverage. A 100-pack costs under $10 and treats 100 liters — enough for one person for over 3 months of drinking water.

    Potable Aqua — Military Standard

    👉 Calculate exactly how much water you need

    Potable Aqua iodine tablets have been the U.S. military’s field water purification standard for decades. They’re effective, proven, and cheap. The main drawback is taste — iodine gives water a distinct medicinal flavor that many people find unpleasant. Potable Aqua sells a companion “PA Plus” neutralizer tablet that removes the iodine taste after treatment. If you go the iodine route, buy the combo pack. Note the important health restrictions: not for pregnant women, people with thyroid conditions, or continuous use beyond 3 weeks.

    Aquamira Water Purifier Tablets

    Aquamira’s chlorine dioxide tablets offer similar pathogen coverage to Katadyn Micropur at a slightly lower price point. Each tablet treats 1 liter with a 15-minute wait for bacteria/viruses and 4 hours for Cryptosporidium. The tablets come in a compact, resealable pouch rather than individual foil packets, which saves space but means you need to keep the package sealed to maintain shelf life. A solid alternative if Micropur is out of stock.

    Are Expired Water Purification Tablets Safe to Use?

    This is one of the most common questions we get, and the answer depends on the tablet type and storage conditions. We cover this further in our emergency survival methods.

    Chlorine dioxide tablets (Katadyn, Aquamira) in individually sealed foil packets retain effectiveness well beyond their printed expiration date — often 1–2 years past expiry when stored in cool, dry conditions. The foil seal prevents moisture and air degradation. However, once the foil is opened, effectiveness drops rapidly.

    Iodine tablets (Potable Aqua) are more sensitive to degradation. Once the bottle is opened and exposed to air, iodine tablets can lose potency within months. Unopened bottles maintain effectiveness through the printed date. If your iodine tablets have turned from gray to yellow or brown, they’ve oxidized and should be replaced.

    NaDCC tablets (Aquatabs) in sealed packaging maintain potency for 5+ years. The key factor is whether the packaging seal is intact. Bulk tablets stored in a properly sealed container remain effective well past the printed date.

    Bottom line: In a true emergency, expired tablets are better than untreated water. But for your preparedness kit, rotate your supply every 4–5 years. Use our free water storage calculator to determine exactly how many tablets you need, then buy accordingly.

    Tablets vs. Filters — When to Use Each

    Water purification tablets versus filters comparison
    Water purification tablets versus filters comparison
    FactorPurification TabletsPortable Filters
    WeightUltralight (grams)Light-moderate (2–12 oz)
    Cost$0.08–$0.70/liter$20–$90 upfront, then free
    Speed15–240 minutesImmediate (pump/squeeze)
    Viruses✅ Most types kill viruses❌ Most filters don’t remove viruses
    Crypto✅ ClO₂ types only✅ Most filters remove Crypto
    TasteChemical taste (varies)Clean, filtered taste
    Best forBug-out bags, backup, lightweight kitsHome base, daily use, groups

    Our recommendation: Carry both. Tablets as your ultralight backup (always in your bag), and a portable filter as your primary purification method at home or base camp. For reusable options, see our portable water filter reviews. For non-tablet methods, see our guide to DIY water purification.

    💡 Pro Tip: Not sure how much water your household actually needs? — try our Water Storage Calculator for a personalized breakdown.

    How Many Tablets Do You Need?

    The standard emergency water recommendation is 1 gallon (3.78 liters) per person per day — half for drinking, half for cooking and hygiene. Here’s what that means for tablet stockpiling:

    ScenarioPeopleDaysLiters NeededTablets (1L each)
    72-hour kit (1 person)131111
    72-hour kit (family of 4)434545
    2-week supply (1 person)1145353
    2-week supply (family of 4)414212212
    90-day supply (1 person)190340340

    Use our water storage calculator to get a personalized count based on your household size. Include tablets in your apartment emergency kit as a lightweight backup to stored water.

    👉 Make sure your supplies fit your space

    Our Top Picks — Quick Recommendations