Portable water filters for emergency situations are essential gear for every urban prepper in 2026. When municipal water systems fail — whether from natural disasters, infrastructure collapse, or contamination events — having a reliable portable water filter for emergency use can mean the difference between survival and a serious health crisis.
This guide reviews the top 5 portable water filters for emergency preparedness, specifically chosen for urban survival scenarios. We’ve tested each filter for flow rate, contaminant removal, portability, and real-world reliability to help you choose the best portable water filters for emergency readiness.
Why You Need Portable Water Filters for Emergency Preparedness
The average person needs one gallon of water per day for drinking and basic hygiene. In an urban emergency, stored water runs out fast — especially in small apartments where storage space is limited. Portable water filters for emergency use allow you to purify water from virtually any freshwater source, dramatically extending your survival timeline.
Use our emergency water storage calculator to determine exactly how much water your household needs, then supplement your stored supply with portable water filters for emergency backup.
Common Urban Water Sources During Emergencies
During an urban emergency, you may need to filter water from sources you’d never normally consider:
- Bathtub and sink reserves — Fill these immediately when you learn of an emergency
- Hot water heater tank — Contains 30-80 gallons of pre-heated water
- Rainwater collection — Balcony or rooftop collection during rain events
- Park ponds and fountains — Last resort, but filterable with the right equipment
- Swimming pools — Chlorinated but may contain other contaminants
Portable water filters for emergency situations can make all of these sources safe to drink. For additional purification methods, see our guide on how to purify water at home.
How We Tested and Ranked These Portable Water Filters for Emergency Use
Our evaluation criteria for portable water filters for emergency preparedness included:
- Filtration effectiveness — Must remove 99.99% of bacteria and 99.9% of protozoa minimum
- Flow rate — How quickly can you get clean water when you need it?
- Filter lifespan — Total gallons before replacement is needed
- Portability — Size and weight for bug-out bags and apartment storage
- Ease of use — Can you operate it under stress with minimal instructions?
- Durability — Will it survive rough handling during an emergency?
- Price-to-value ratio — Best protection per dollar spent
Top 5 Portable Water Filters for Emergency Survival (2026)
1. Sawyer Squeeze SP131 — Best Overall Portable Water Filter for Emergency Use
The Sawyer Squeeze consistently ranks as the top portable water filter for emergency preparedness, and for good reason. Its hollow fiber membrane technology removes 99.99999% of bacteria and 99.9999% of protozoa — exceeding EPA standards.
Key Specifications:
- Filtration: 0.1 micron absolute hollow fiber membrane
- Flow rate: Up to 1.7 liters per minute
- Filter lifespan: Up to 100,000 gallons (with proper backwashing)
- Weight: 3 oz (filter only)
- Includes: 3 squeeze pouches, drinking straw, cleaning syringe
Why it’s #1 for emergency use: The Sawyer Squeeze offers the best combination of filtration quality, flow rate, and lifespan of any portable water filter for emergency situations. Its 100,000-gallon capacity means you’ll likely never need a replacement filter, and the squeeze pouch system works without electricity or pumping.
Urban prepper tip: Attach the Sawyer Squeeze inline to a hydration bladder for hands-free filtered water during evacuation scenarios.
2. LifeStraw Personal — Best Budget Portable Water Filter for Emergency Kits
The LifeStraw Personal is the most recognized portable water filter for emergency preparedness worldwide. Its simplicity makes it ideal for emergency kits where reliability under stress is paramount.
Key Specifications:
- Filtration: 0.2 micron hollow fiber membrane
- Flow rate: 0.5 liters per minute (sip-based)
- Filter lifespan: 1,000 gallons (4,000 liters)
- Weight: 2 oz
- No batteries, moving parts, or chemicals required
Why it’s great for emergencies: At under $20, the LifeStraw is the most affordable portable water filter for emergency kits. Keep one in your apartment emergency kit, one in your car, and one in your bug-out bag.
3. Katadyn BeFree 1.0L — Best Portable Water Filter for Emergency Speed
The Katadyn BeFree offers the fastest flow rate of any portable water filter for emergency use in its class. The EZ-Clean membrane technology allows you to shake the filter clean without tools.
Key Specifications:
- Filtration: 0.1 micron hollow fiber membrane
- Flow rate: Up to 2 liters per minute
- Filter lifespan: 1,000 liters
- Weight: 2.3 oz
- Collapsible soft flask included
Why it excels in emergencies: When you need clean water fast, the Katadyn BeFree delivers. Its 2 L/min flow rate is the fastest among personal portable water filters for emergency situations, and the collapsible flask takes up almost no space in your kit.
4. MSR Guardian Purifier — Best Portable Water Filter for Emergency Virus Protection
The MSR Guardian is the only portable water filter for emergency use on this list that also removes viruses without chemicals. This makes it the top choice for urban emergencies where sewage contamination is a concern.
Key Specifications:
- Filtration: 0.02 micron hollow fiber (removes viruses, bacteria, and protozoa)
- Flow rate: 2.5 liters per minute
- Filter lifespan: 10,000 liters
- Weight: 17.3 oz
- Self-cleaning technology — never needs backwashing
Why it’s worth the investment: In urban flood scenarios, water sources are often contaminated with sewage containing viruses like norovirus and hepatitis A. The MSR Guardian is the only portable water filter for emergency use that provides complete protection against all three pathogen categories without chemical treatment.
5. Grayl GeoPress 24 oz — Best All-in-One Portable Water Filter for Emergency Use
The Grayl GeoPress combines filtration and purification in a single press-and-drink bottle. It’s the most convenient portable water filter for emergency situations where simplicity matters.
Key Specifications:
- Filtration: Removes viruses, bacteria, protozoa, chemicals, and heavy metals
- Flow rate: 24 oz in 8 seconds (press mechanism)
- Filter lifespan: 65 gallons (250 liters) per cartridge
- Weight: 15.9 oz
- Built-in bottle — no additional containers needed
Why it’s ideal for urban emergencies: The Grayl GeoPress is the easiest portable water filter for emergency use — fill, press, drink. It removes everything including chemicals and heavy metals, making it perfect for questionable urban water sources. The trade-off is a shorter filter lifespan, so stock extra cartridges.
Portable Water Filters for Emergency Use: Comparison Table
| Filter | Filtration Level | Flow Rate | Lifespan | Weight | Removes Viruses? | Price Range |
|---|---|---|---|---|---|---|
| Sawyer Squeeze | 0.1 micron | 1.7 L/min | 100,000 gal | 3 oz | No | $30-35 |
| LifeStraw Personal | 0.2 micron | 0.5 L/min | 1,000 gal | 2 oz | No | $15-20 |
| Katadyn BeFree | 0.1 micron | 2 L/min | 264 gal | 2.3 oz | No | $40-45 |
| MSR Guardian | 0.02 micron | 2.5 L/min | 2,642 gal | 17.3 oz | Yes | $350-370 |
| Grayl GeoPress | Purifier | 24oz/8sec | 65 gal | 15.9 oz | Yes | $90-100 |
How to Choose the Right Portable Water Filter for Emergency Preparedness
Selecting the best portable water filter for emergency use depends on your specific situation:
For Apartment Emergency Kits
Choose the Sawyer Squeeze as your primary portable water filter for emergency home use, supplemented by a LifeStraw in each family member’s personal kit. The Sawyer’s massive filter lifespan means you’ll have clean water capability for years.
For Bug-Out Bags
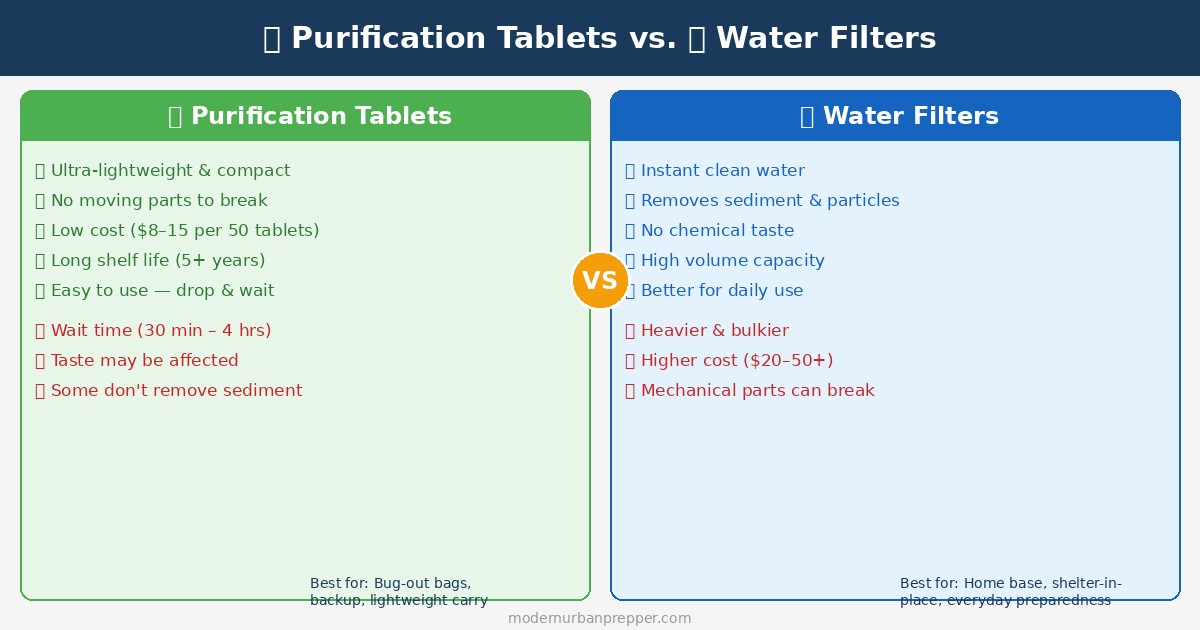
The Katadyn BeFree or LifeStraw are the best portable water filters for emergency evacuation due to their ultralight weight and compact size. Pair with water purification tablets as a backup method.
For Urban Flood or Sewage Scenarios
The MSR Guardian or Grayl GeoPress are essential when virus removal is needed. Urban flooding often mixes sewage with floodwater, making virus-capable portable water filters for emergency use critical.
Maintaining Your Portable Water Filters for Emergency Readiness
Owning portable water filters for emergency use isn’t enough — you need to maintain them so they work when disaster strikes:
- Test annually — Run water through your filters at least once a year to verify function
- Backwash regularly — Sawyer filters need periodic backwashing with the included syringe
- Store properly — Keep filters in a cool, dry place. Never store a wet filter in a sealed container (mold risk)
- Check expiration dates — Chemical purification tablets and Grayl cartridges have shelf lives
- Stock replacement parts — Extra squeeze pouches, cartridges, and O-rings
Include portable water filters for emergency use in your regular prepper checklist rotation to ensure everything stays in working order.
Complementing Portable Water Filters with Other Emergency Water Strategies
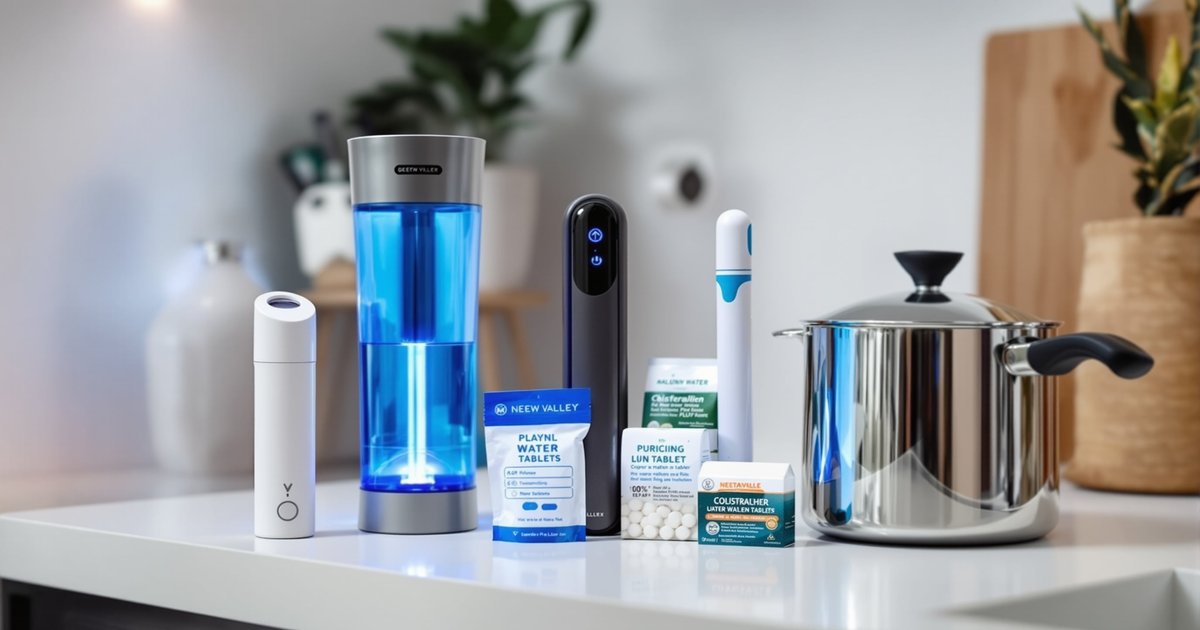
Portable water filters for emergency situations work best as part of a comprehensive water security plan. Combine them with:
- Stored water — Minimum 3-day supply per person (use our water storage calculator)
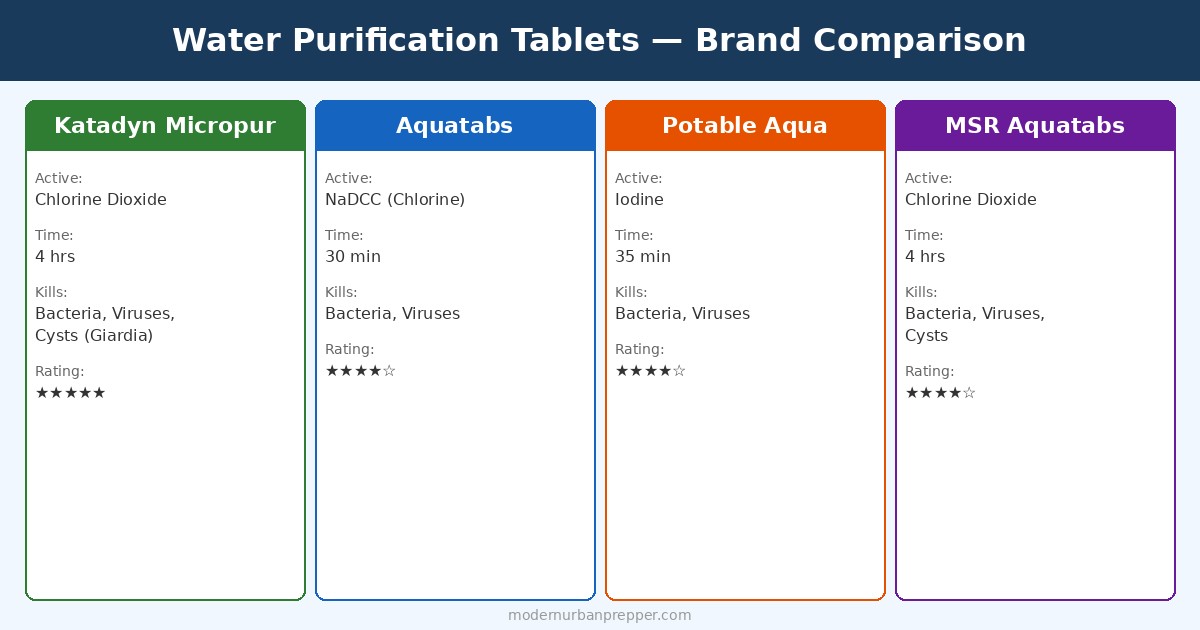
- Water purification tablets — Chemical backup for your portable water filters
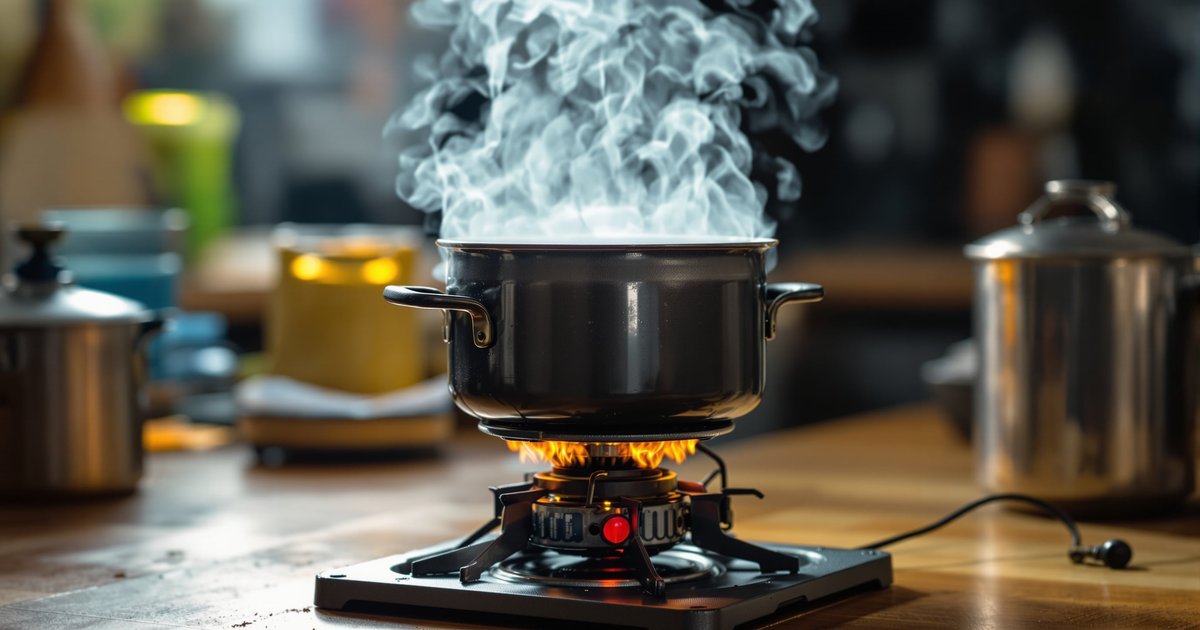
- Boiling capability — A camp stove or alternative heat source for the most reliable purification method
- Water containers — Collapsible water jugs for collection and transport
For a complete water and food preparedness strategy, read our urban water and food security guide.
Frequently Asked Questions About Portable Water Filters for Emergency Use
Do portable water filters for emergency use remove chemicals and heavy metals?
Most portable water filters for emergency use (like the Sawyer Squeeze and LifeStraw) remove bacteria and protozoa but NOT chemicals or heavy metals. Only the Grayl GeoPress and activated carbon filters remove chemical contaminants. For chemical contamination concerns, pair your filter with activated carbon or choose the Grayl GeoPress.
How long do portable water filters for emergency preparedness last?
Filter lifespan varies dramatically. The Sawyer Squeeze lasts up to 100,000 gallons, while the Grayl GeoPress cartridge lasts only 65 gallons. For long-term emergency preparedness, choose filters with longer lifespans and stock replacement cartridges for shorter-lived models.
Can portable water filters for emergency use purify saltwater?
No. No portable water filter for emergency use can desalinate saltwater. These filters remove biological contaminants and some chemicals, but they cannot remove dissolved salt. For coastal emergencies, you would need a desalination device or solar still.
Should I carry multiple portable water filters for emergency situations?
Yes. The “two is one, one is none” rule applies to portable water filters for emergency preparedness. Carry a primary filter (like the Sawyer Squeeze) and a backup (like the LifeStraw or purification tablets). Redundancy is critical when clean water is a survival necessity.
How do I store portable water filters for emergency readiness?
Store portable water filters for emergency use in a cool, dry location away from direct sunlight. If a filter has been used, ensure it’s completely dry before storage to prevent mold growth. Include filters in your emergency kit and check them during regular preparedness reviews.
Final Verdict: Best Portable Water Filters for Emergency Preparedness
For most urban preppers, the Sawyer Squeeze SP131 is the best overall portable water filter for emergency preparedness. Its combination of superior filtration, incredible lifespan, lightweight design, and affordable price makes it the clear winner for apartment emergency kits and bug-out bags alike.
However, the best approach is a layered one: pair a Sawyer Squeeze with LifeStraw backups and water purification tablets for comprehensive emergency water security. Your portable water filters for emergency use are only as good as your overall preparedness plan — so make sure water filtration is part of your complete urban survival strategy.